Data collection process
File-based integration
This type of integration includes data collection to AWS S3 within a bucket with a predefined name (client's name) (i.e. s3://{sais-client_name}).
Credentials for client's bucket on Solver AI Suite infrastructure are delivered is an agreed and secure way.
The following table shows the locations where corresponding data exports should be placed.
| Entity | Path |
|---|---|
| Transactions | s3://sais-{client_name}/initial-data/transactions/transactions_{date}.csv |
| Items | s3://sais-{client_name}/initial-data/items/items.csv |
| Customers | s3://sais-{client_name}/initial-data/customers/customers.csv |
| Leaflet | s3://sais-{client_name}/initial-data/leaflet/leaflet.csv |
| Store | s3://sais-{client_name}/initial-data/stores/stores.csv |
All the above listed paths are fixed and used for initial data export as well as all future daily data exports.
All data is delivered once per day, ideally during the night (around 2-3am). Transactions data is delivered from the previous day.
Data Storage (S3) integration instructions
- The first step is to install a command line for AWS (aws-cli). On the next link you can find steps for each OS. For Windows, you will use the graphical interface, but for Linux, it’s enough to copy the first block from the documentation.
- After installation, you need to add the user profile via the command: 'aws configure import --csv file:///path/to/file/sais-{client_name}.csv'. This CSV file is attached to the email Things Solver team provided to the client after initial environment setup. That email contains credentials for accessing the S3.
- It’s possible to check if the profile is added with the next command: 'aws configure list-profiles'. The output of the command should be a list of all users (if there are more than one), and one of them is 'sais-{client_name}'.
- To upload files to S3, it is necessary to use the command 'cp' in the next format: 'aws s3 cp /path/to/file/data_to_upload.csv s3://sais-client_name/initial-data/folder-in-which-you-want-to-uload/ --profile sais-{client_name}'.
After setup, it is possible to upload all files from the local directory. For CSV files, you can use the next command:
aws s3 cp /path/to/folder s3://sais-client_name/initial-data --recursive --exclude"*" --include ".csv" --profile sais-client_name
WooCommerce integration instructions
This is a five-step guide on integrating your WooCommerce website with Solver AI Suite that will allow you to use all of the SAIS functionality and with it increase your sales potential and offer a personalized experience for your customers.
Note: Before starting it is essential to have your environment provisioned by Things Solver.
Step 1. Go to your website domain in your favorite browser. Example:
https://example-of-your-website.com
Add /wp-admin suffix at the end of your domain so that it looks like the example below and hit enter/return on your keyboard.
https://example-of-your-website.com/wp-admin

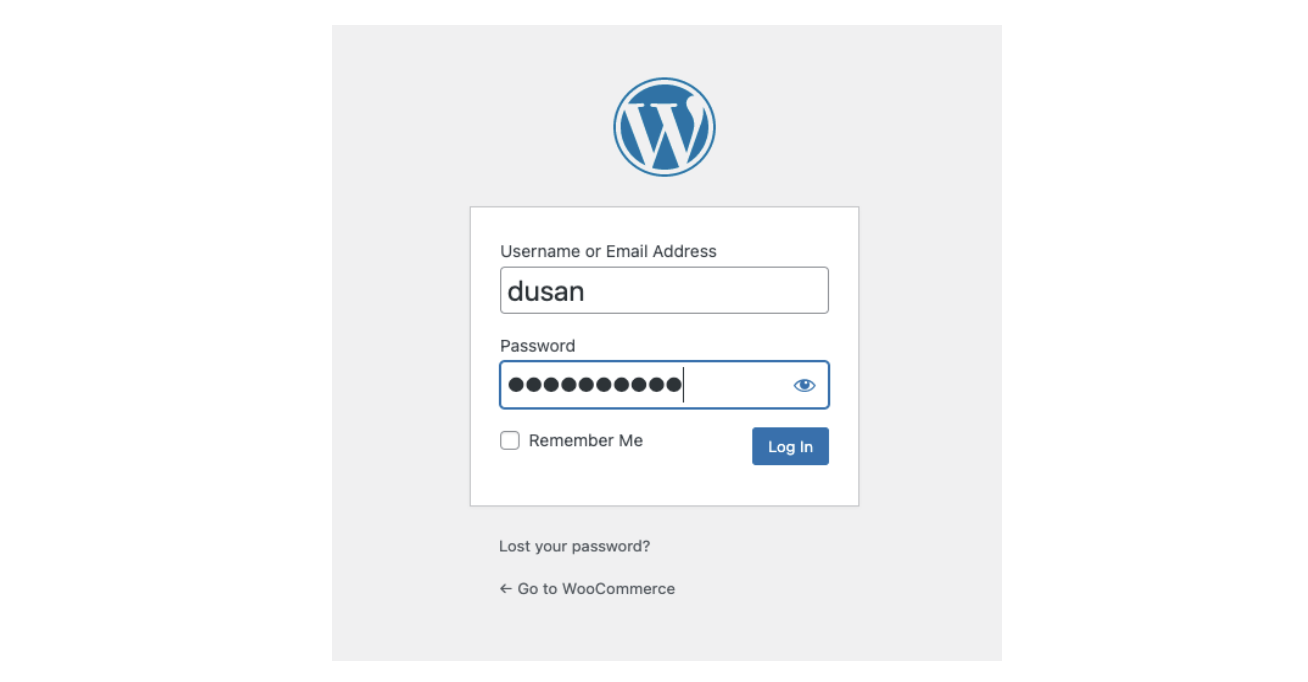
Step 2. After a login page of the WooCommerce dashboard opens, input your username and password, and click on Log in button:
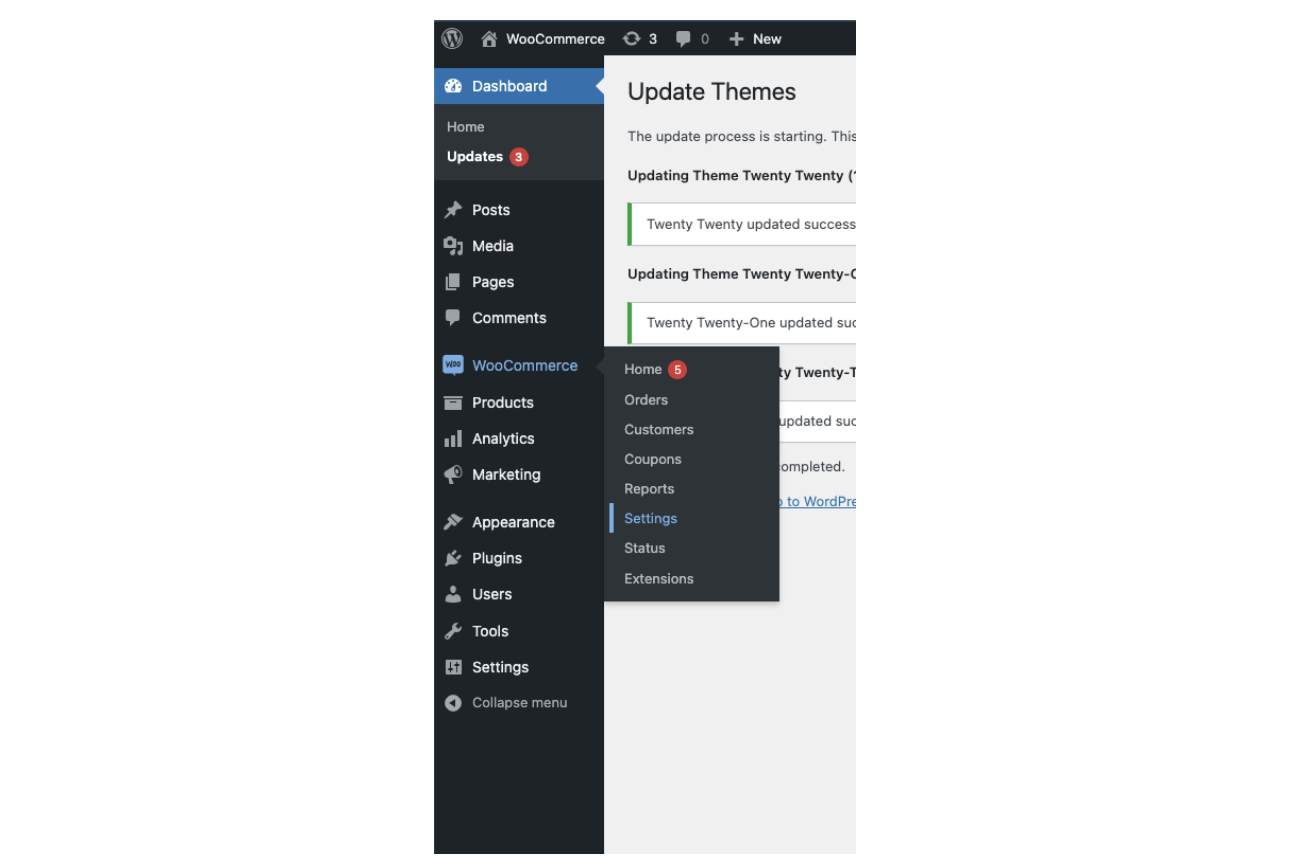
Step 3. On the left side section of the dashboard click on the WooCommerce tab and on the Settings submenu button. WooCommerce->Settings
Step 4. On the settings page select the Advanced tab and click on the REST API link on the left side.
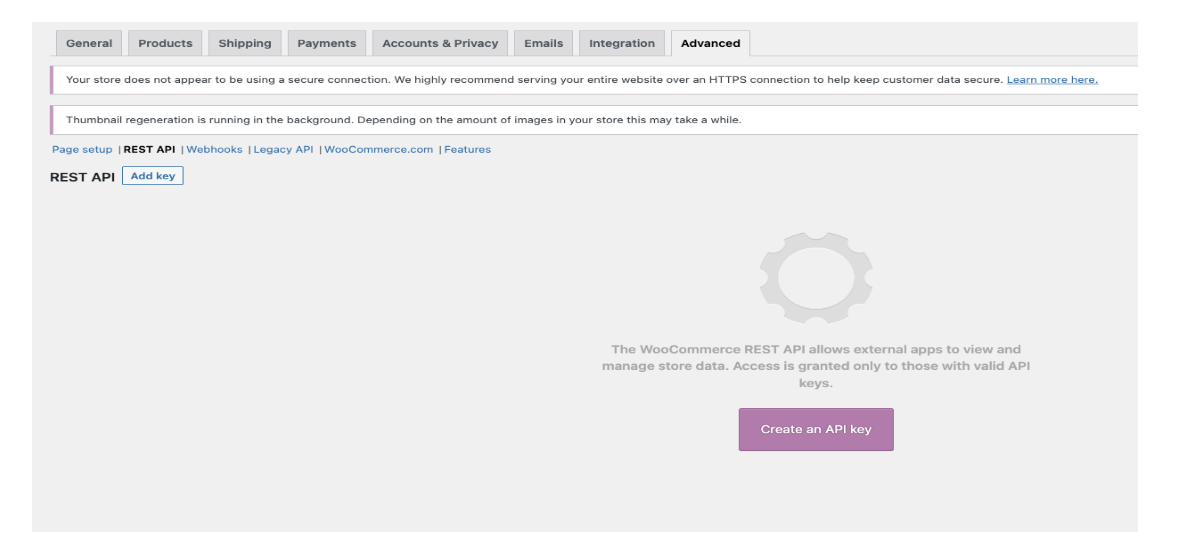
After the page loads, click on the Create an API key button in the center of the page. Add a description that will help you remember the key that will be generated, and select a user that will be used for pulling the data of the API, that can be your user. The last drop-down named Permissions should be set to read so that SAIS will only read the data from your website.

After clicking the Generate API key button, you will be presented with a Customer key and Customer secret that are used to integrate your website with Solver AI Suite.
Step 5. Send the keys to your Things Solver contact and access to your SAIS instance will be sent to you within a few hours.

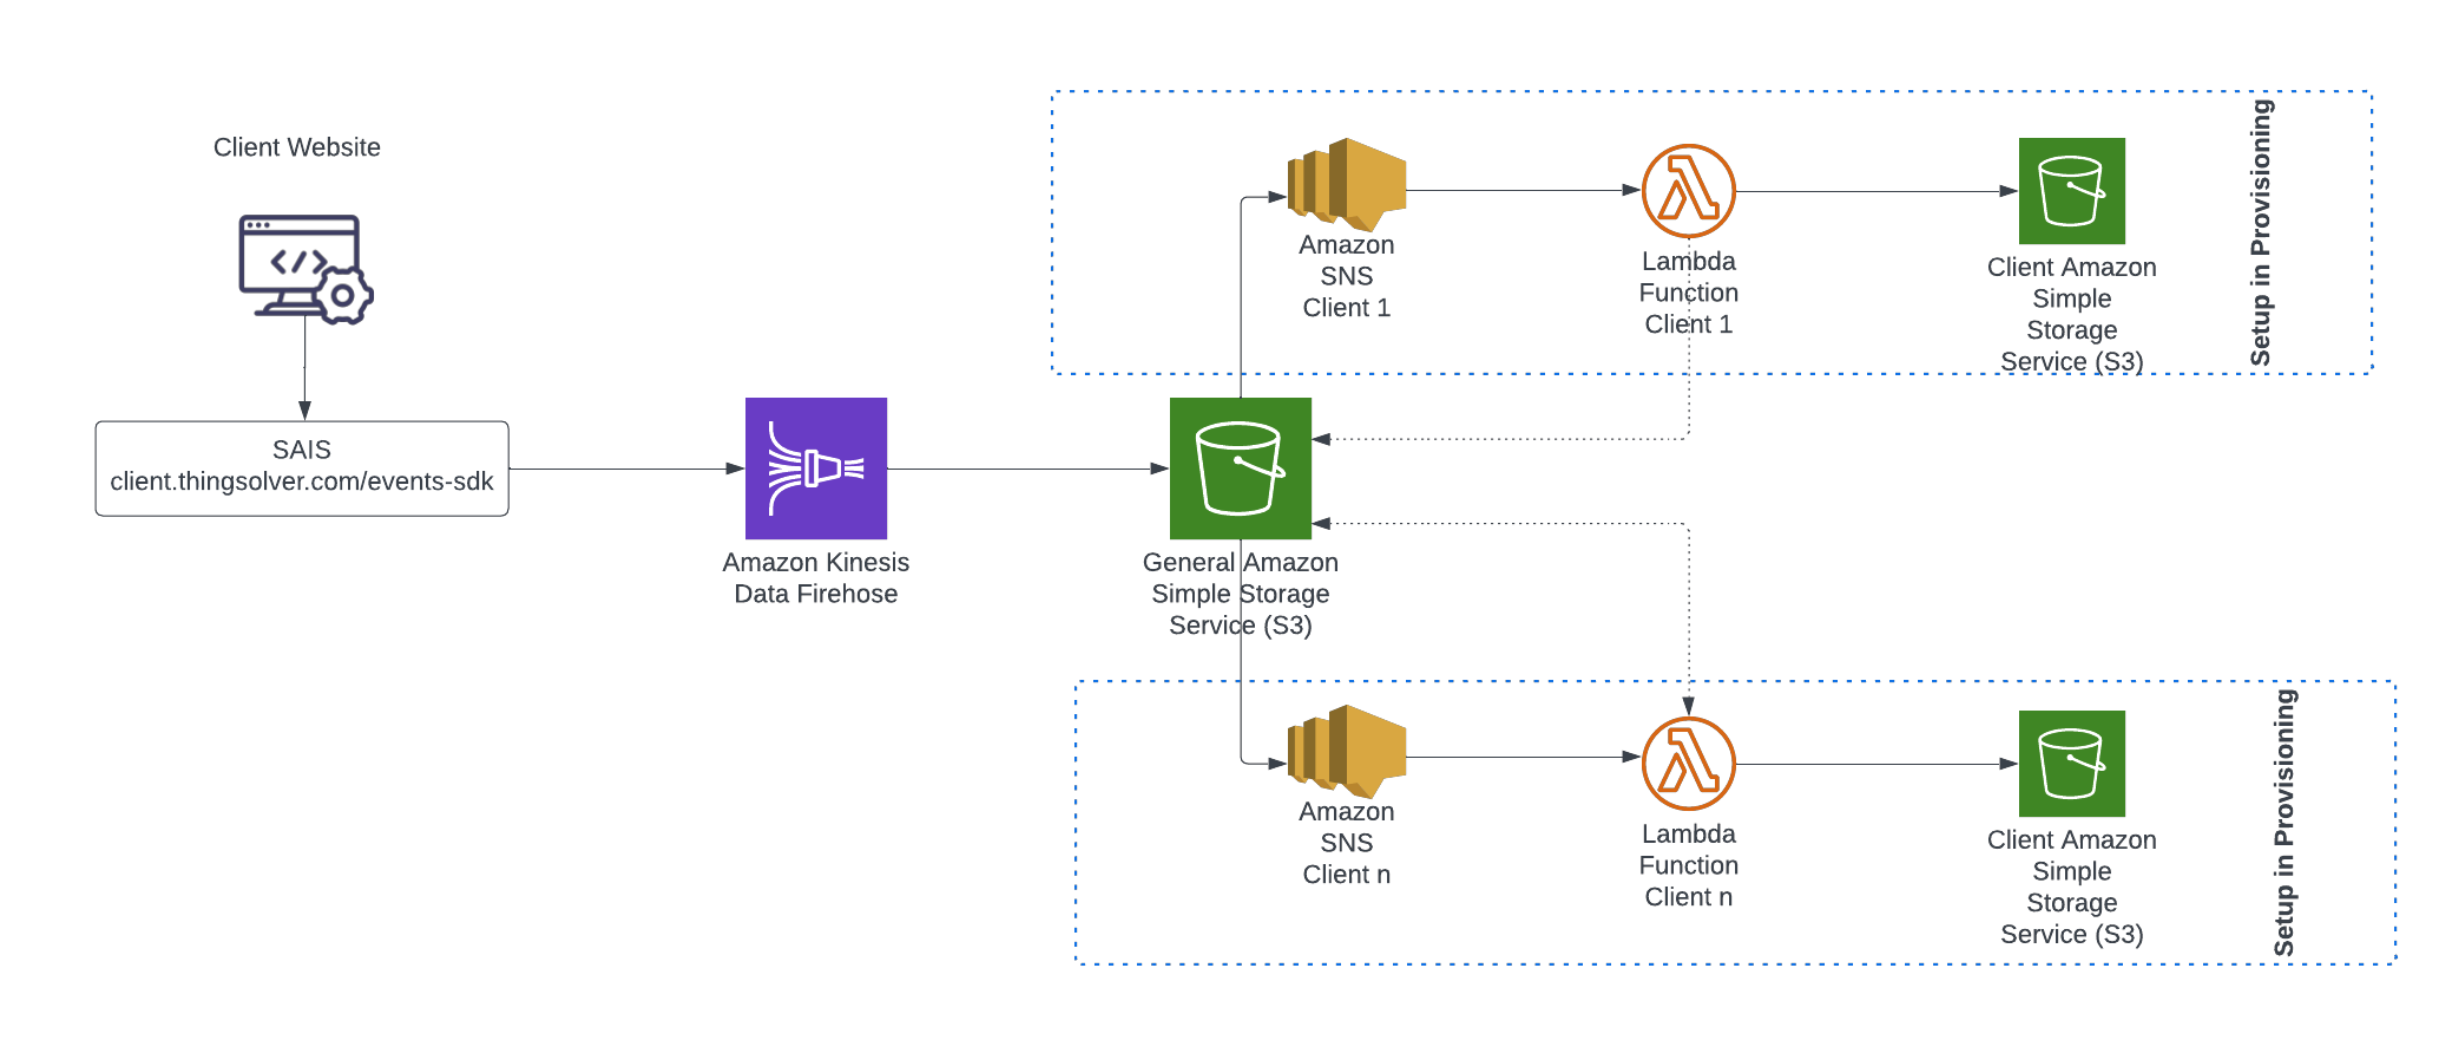
Event-based integration
Events SDK integration instructions
Get Things Solver Events SDK Code
This type of integration includes data collection through Events SDK.
Step 1 – Open the Solver AI Suite app
Go to your account, your-company.thingsolver.com. Click the Data tab. For this option, you must be an Admin user.

Step 2 – Get code snippet
Click on the Set Events SDK button.
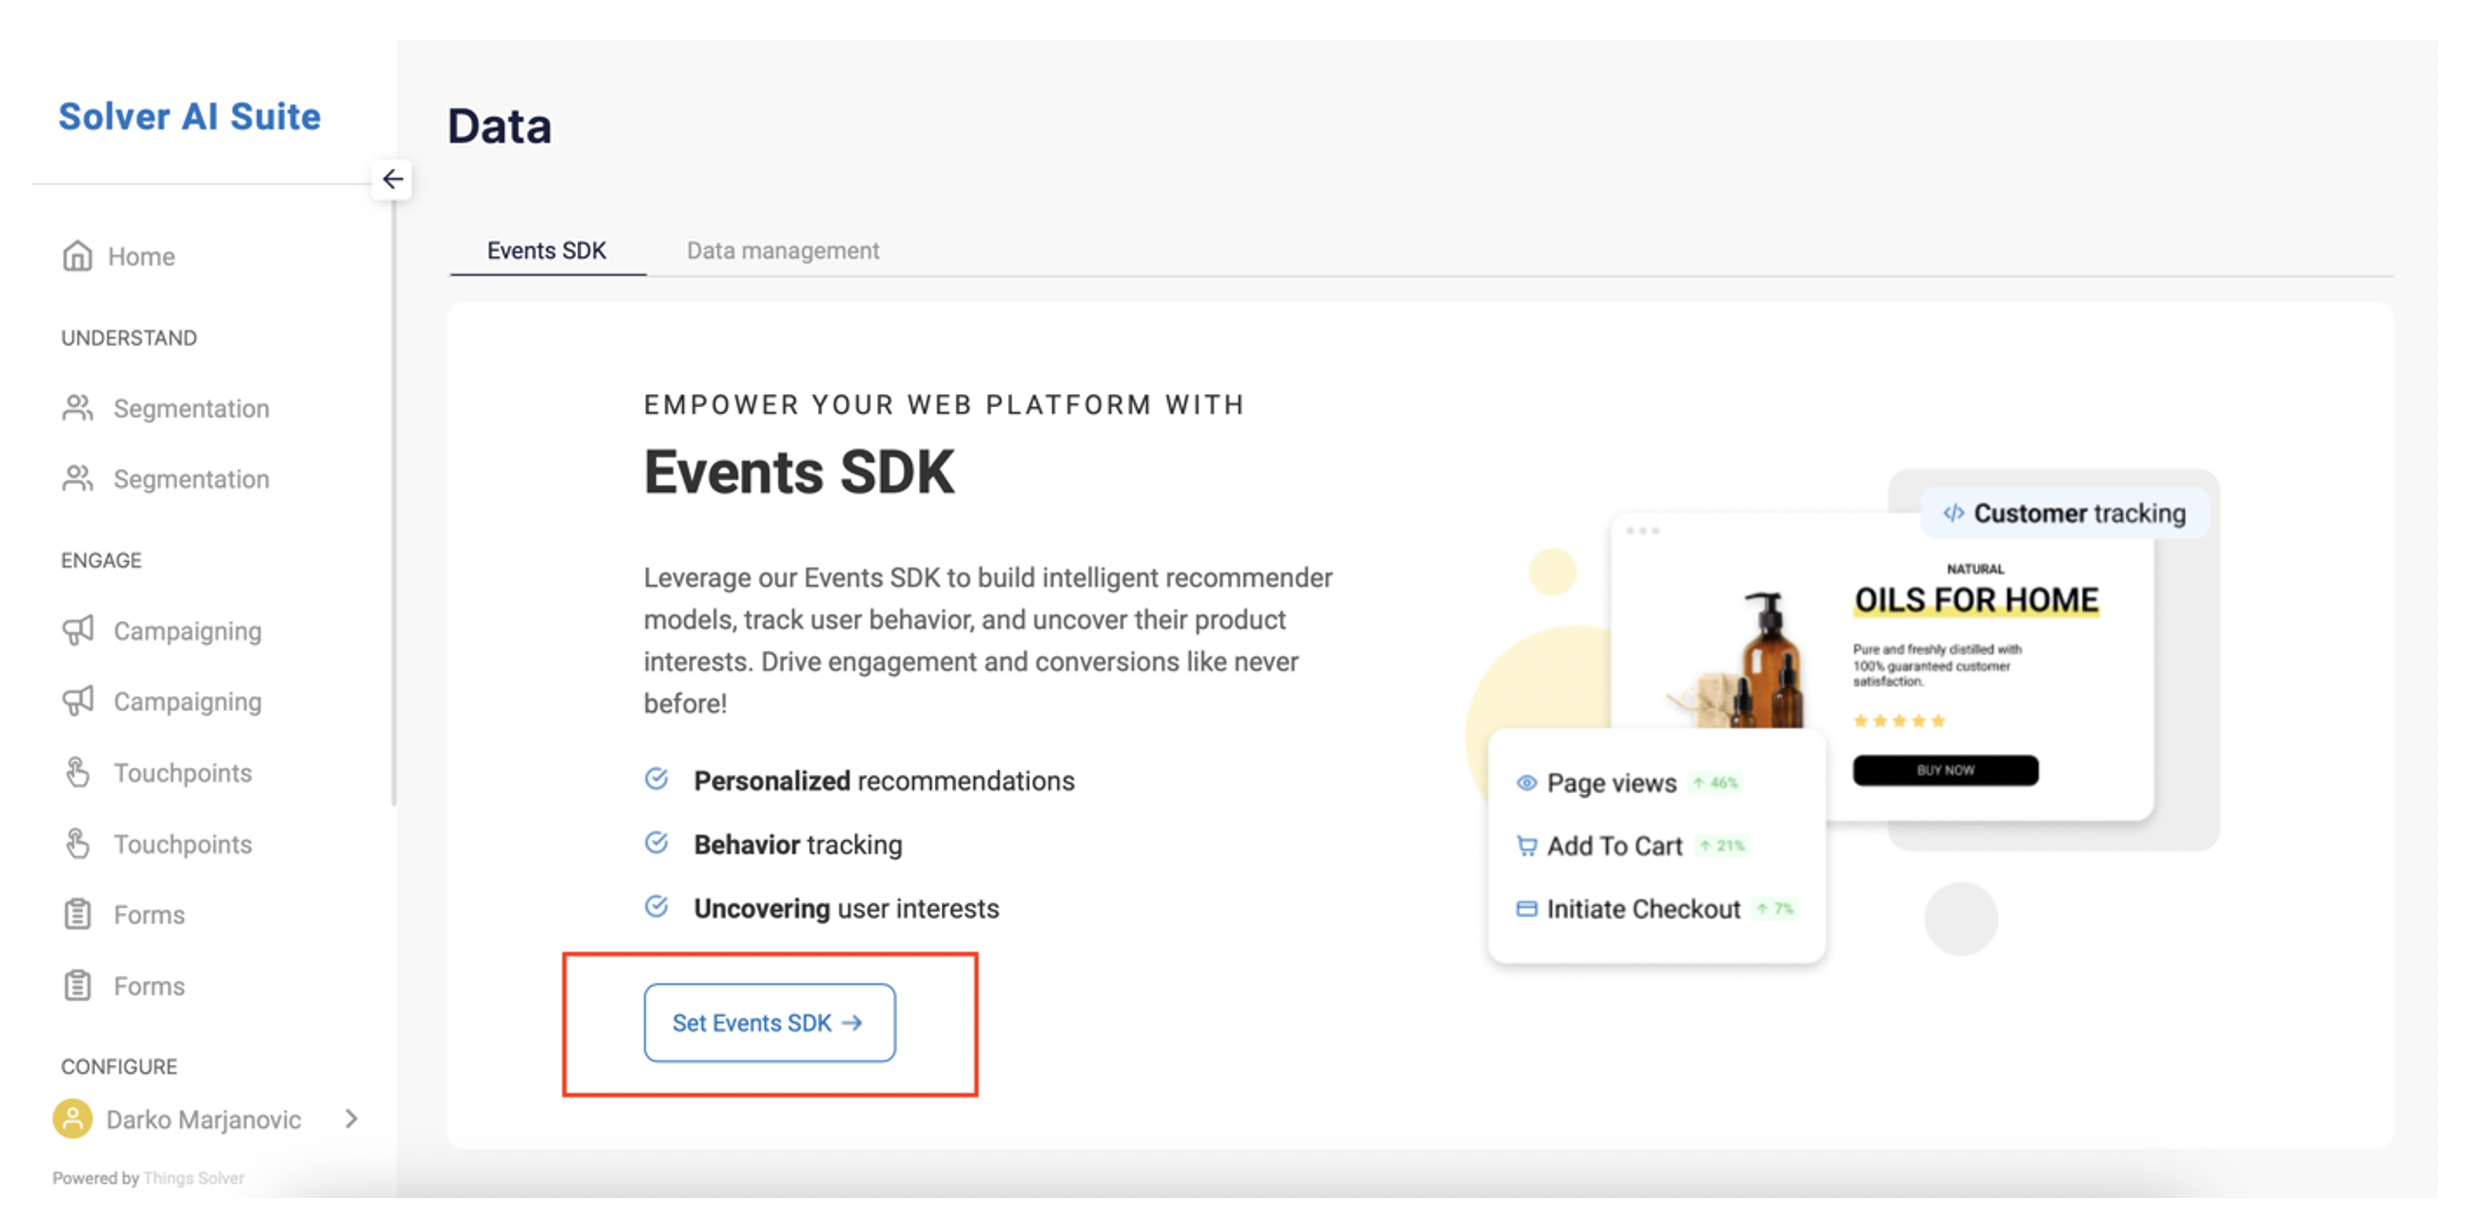
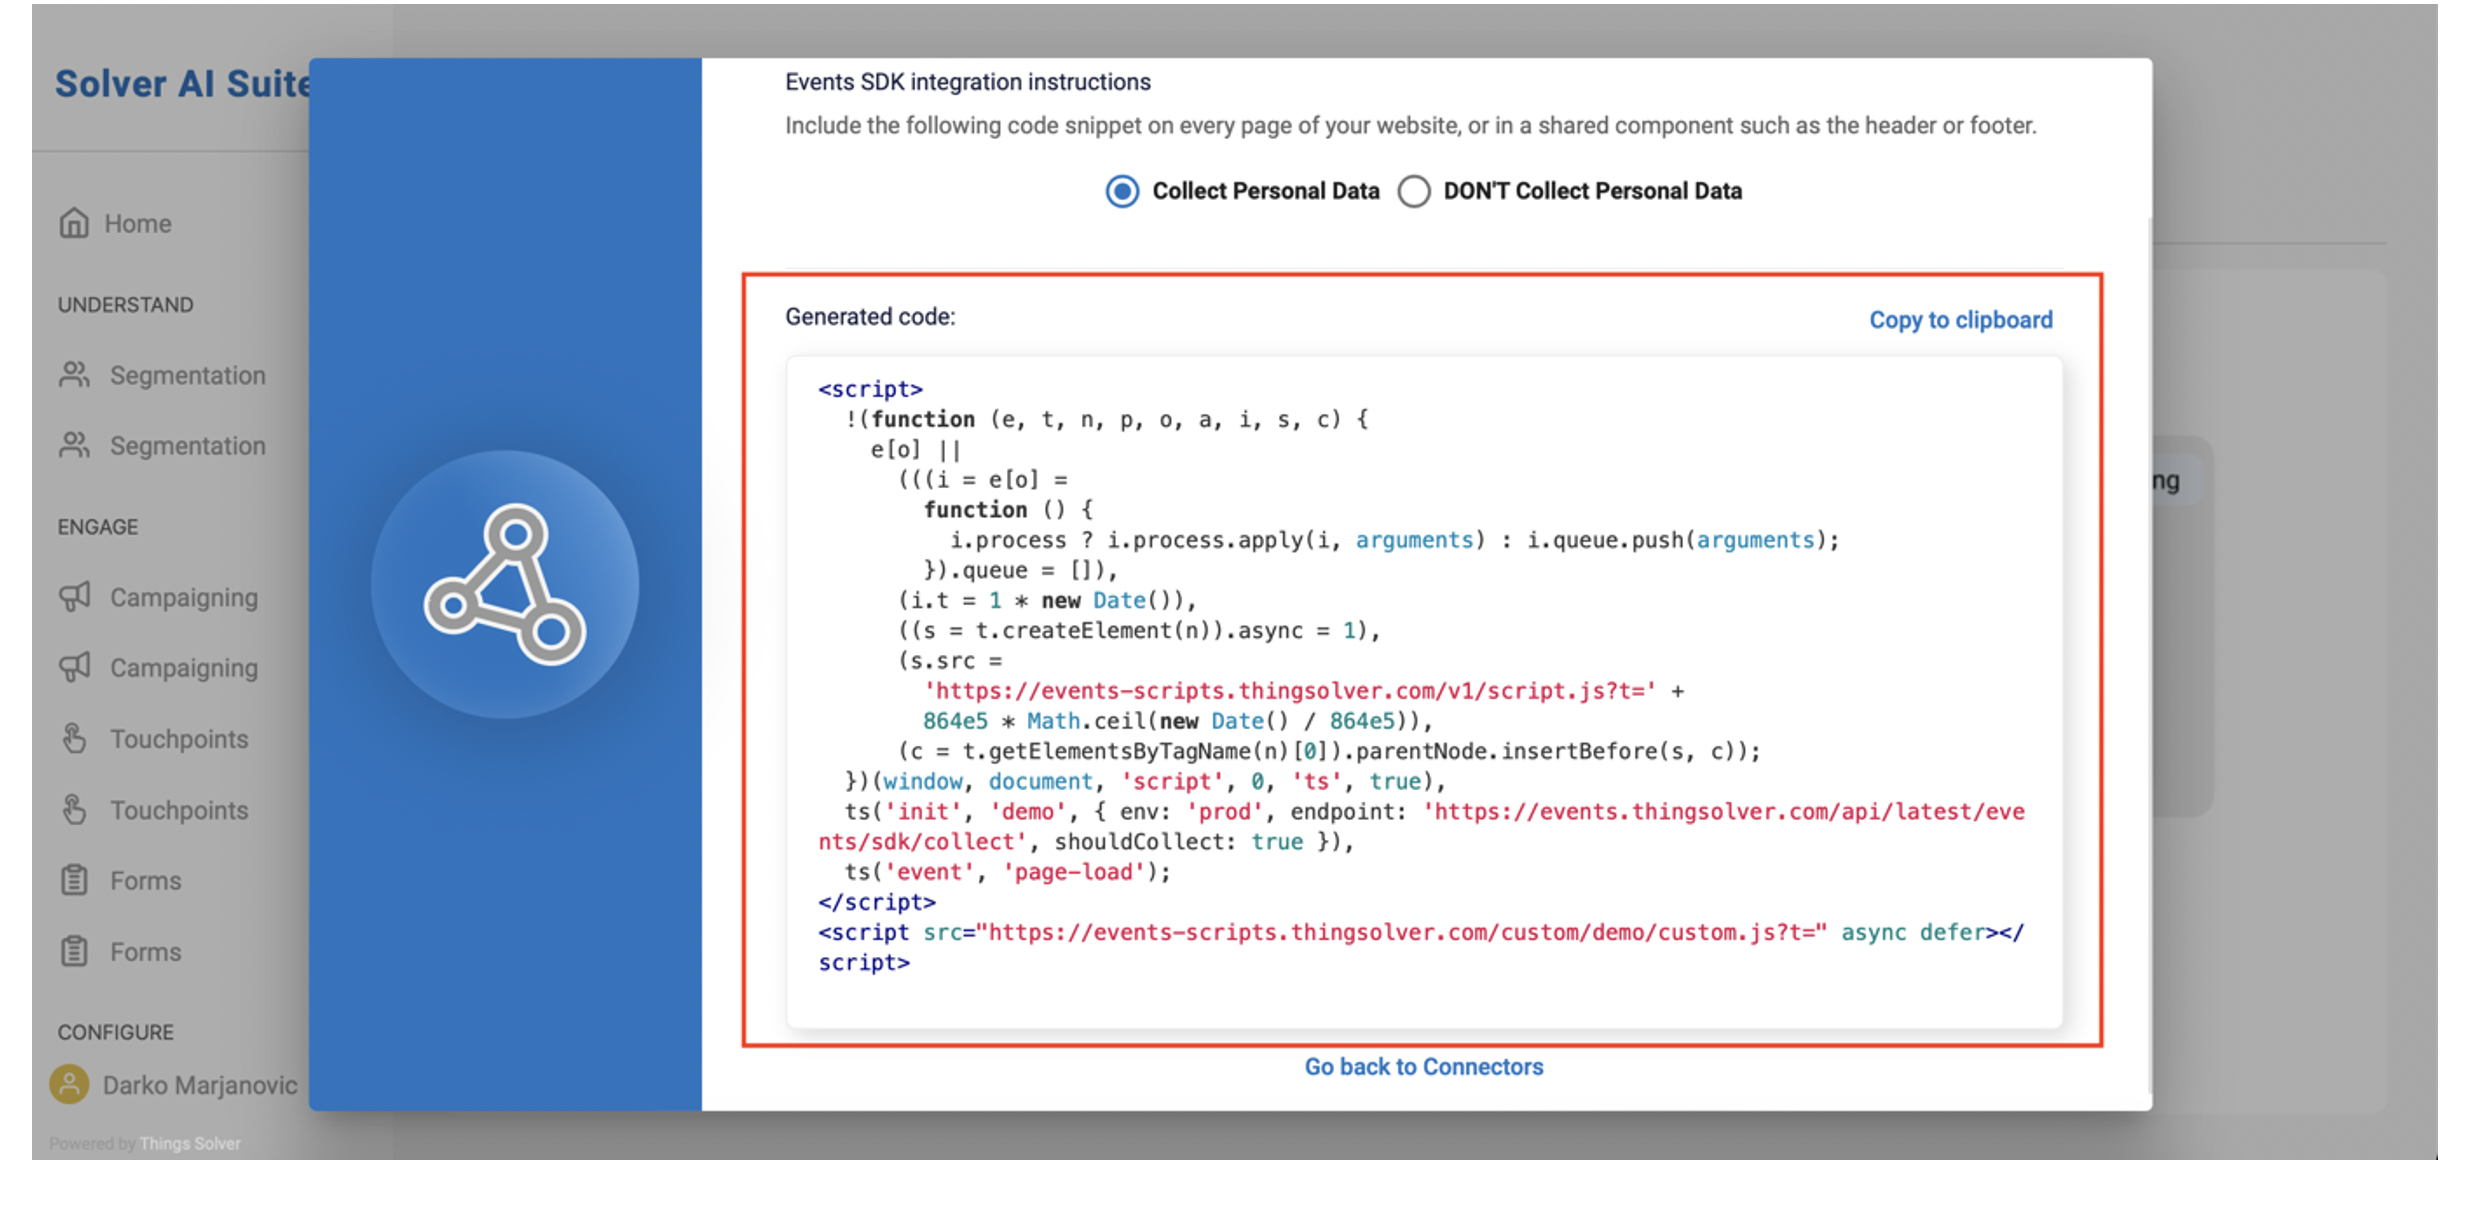
Step 3 – Copy code
Copy snippet.
Add Code Snippet to Google Tag Manager
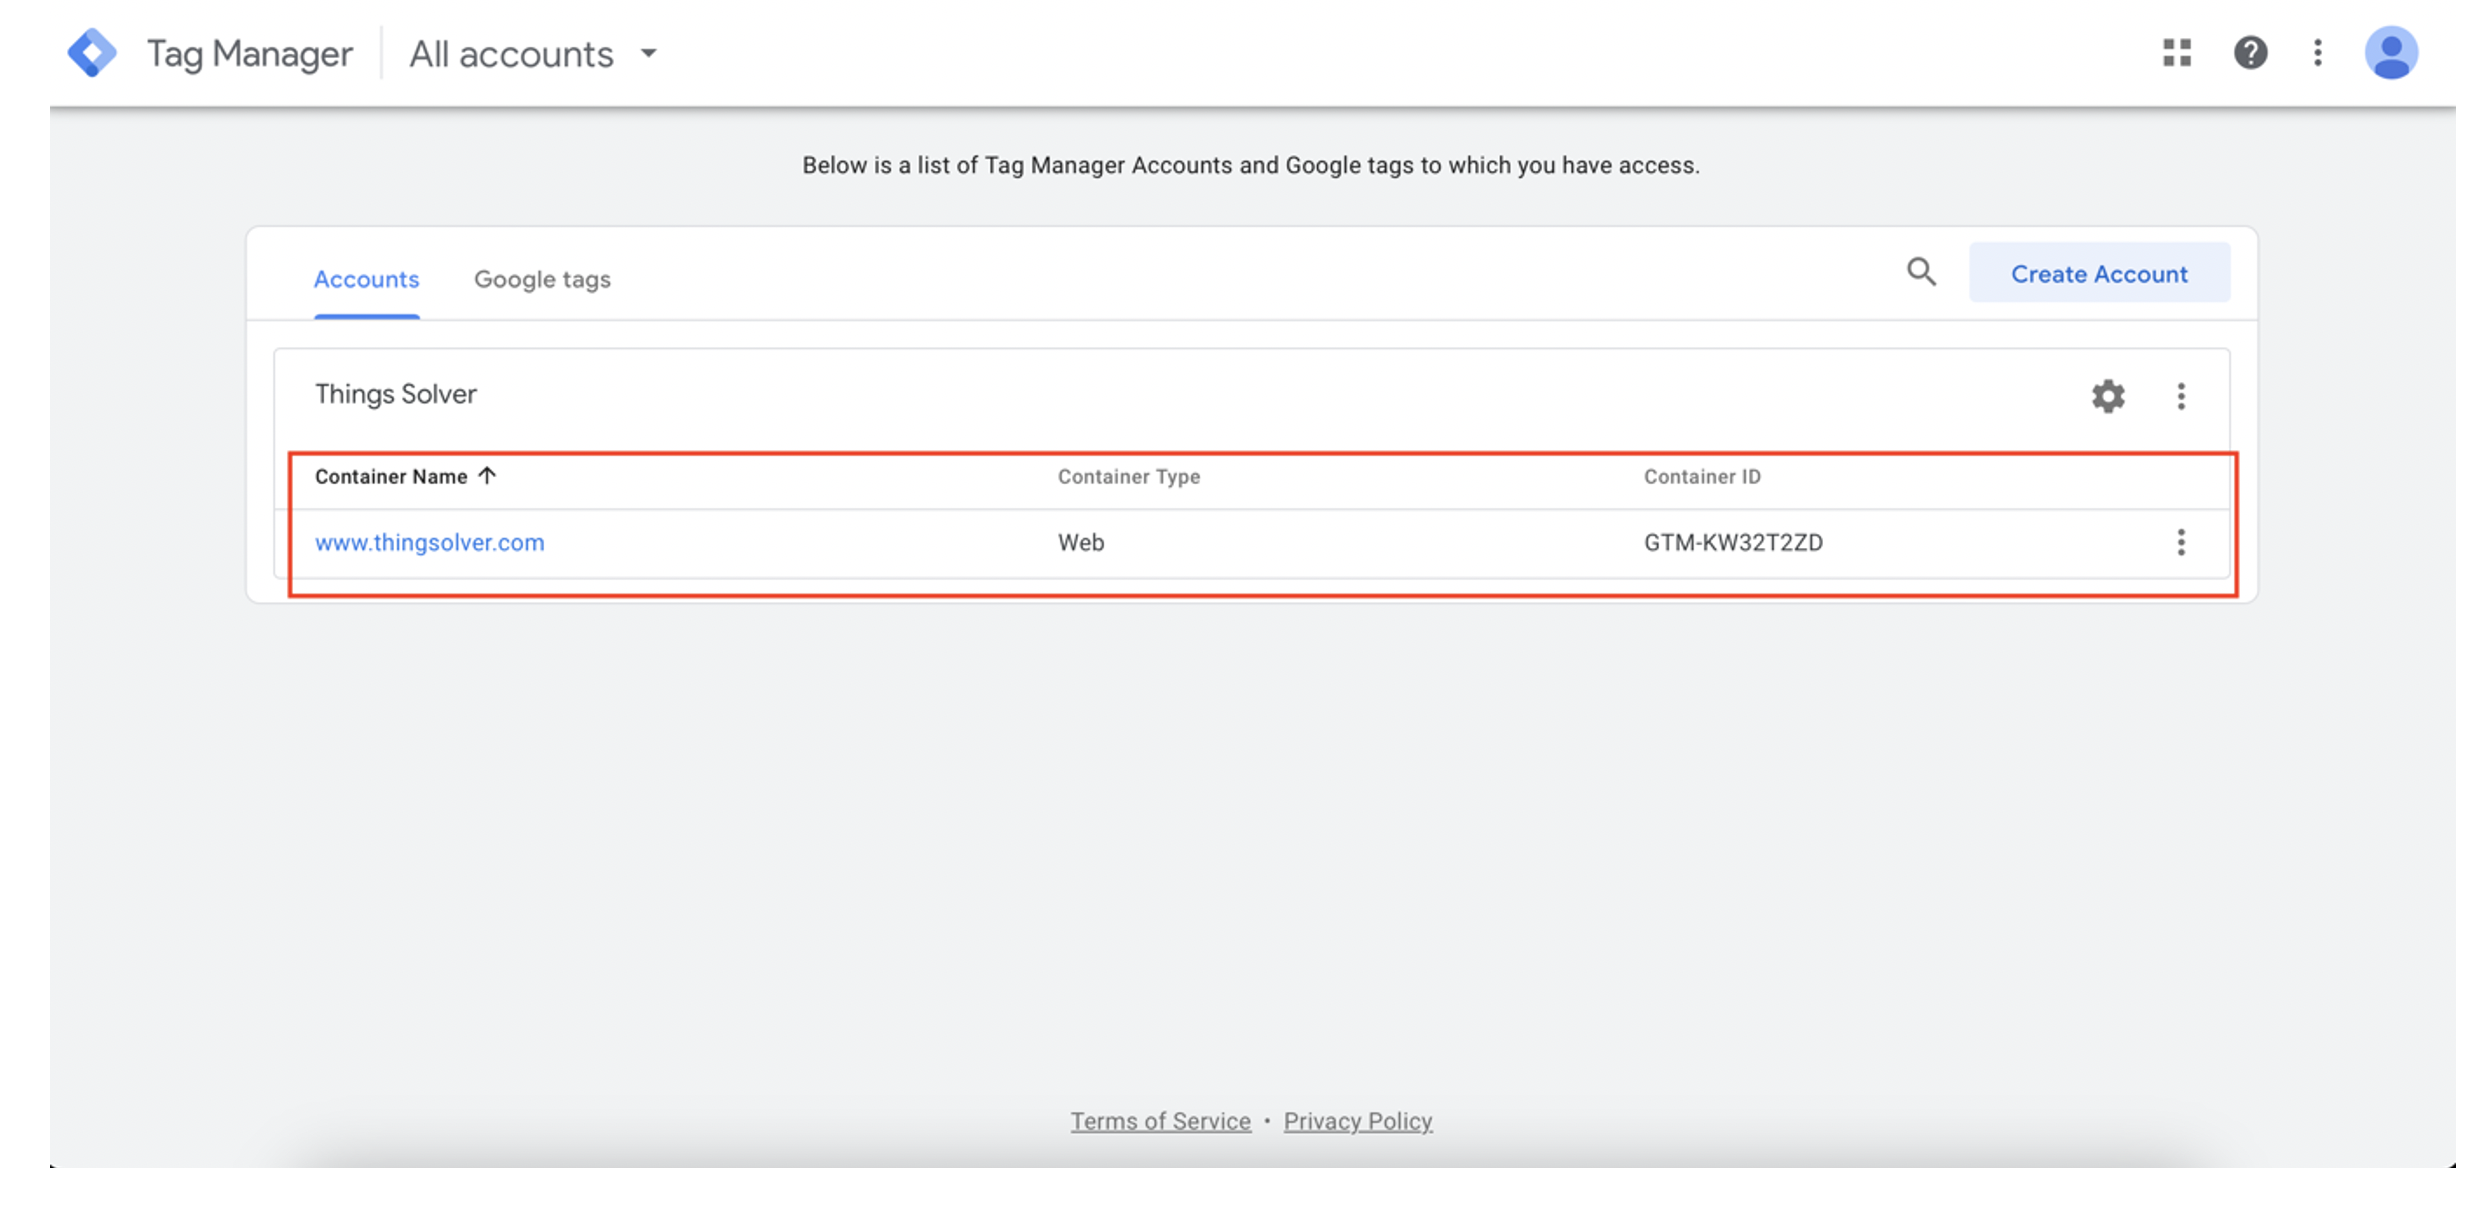
Step 1 – Open Google Tag Manager
Choose Container, where to add a snippet.
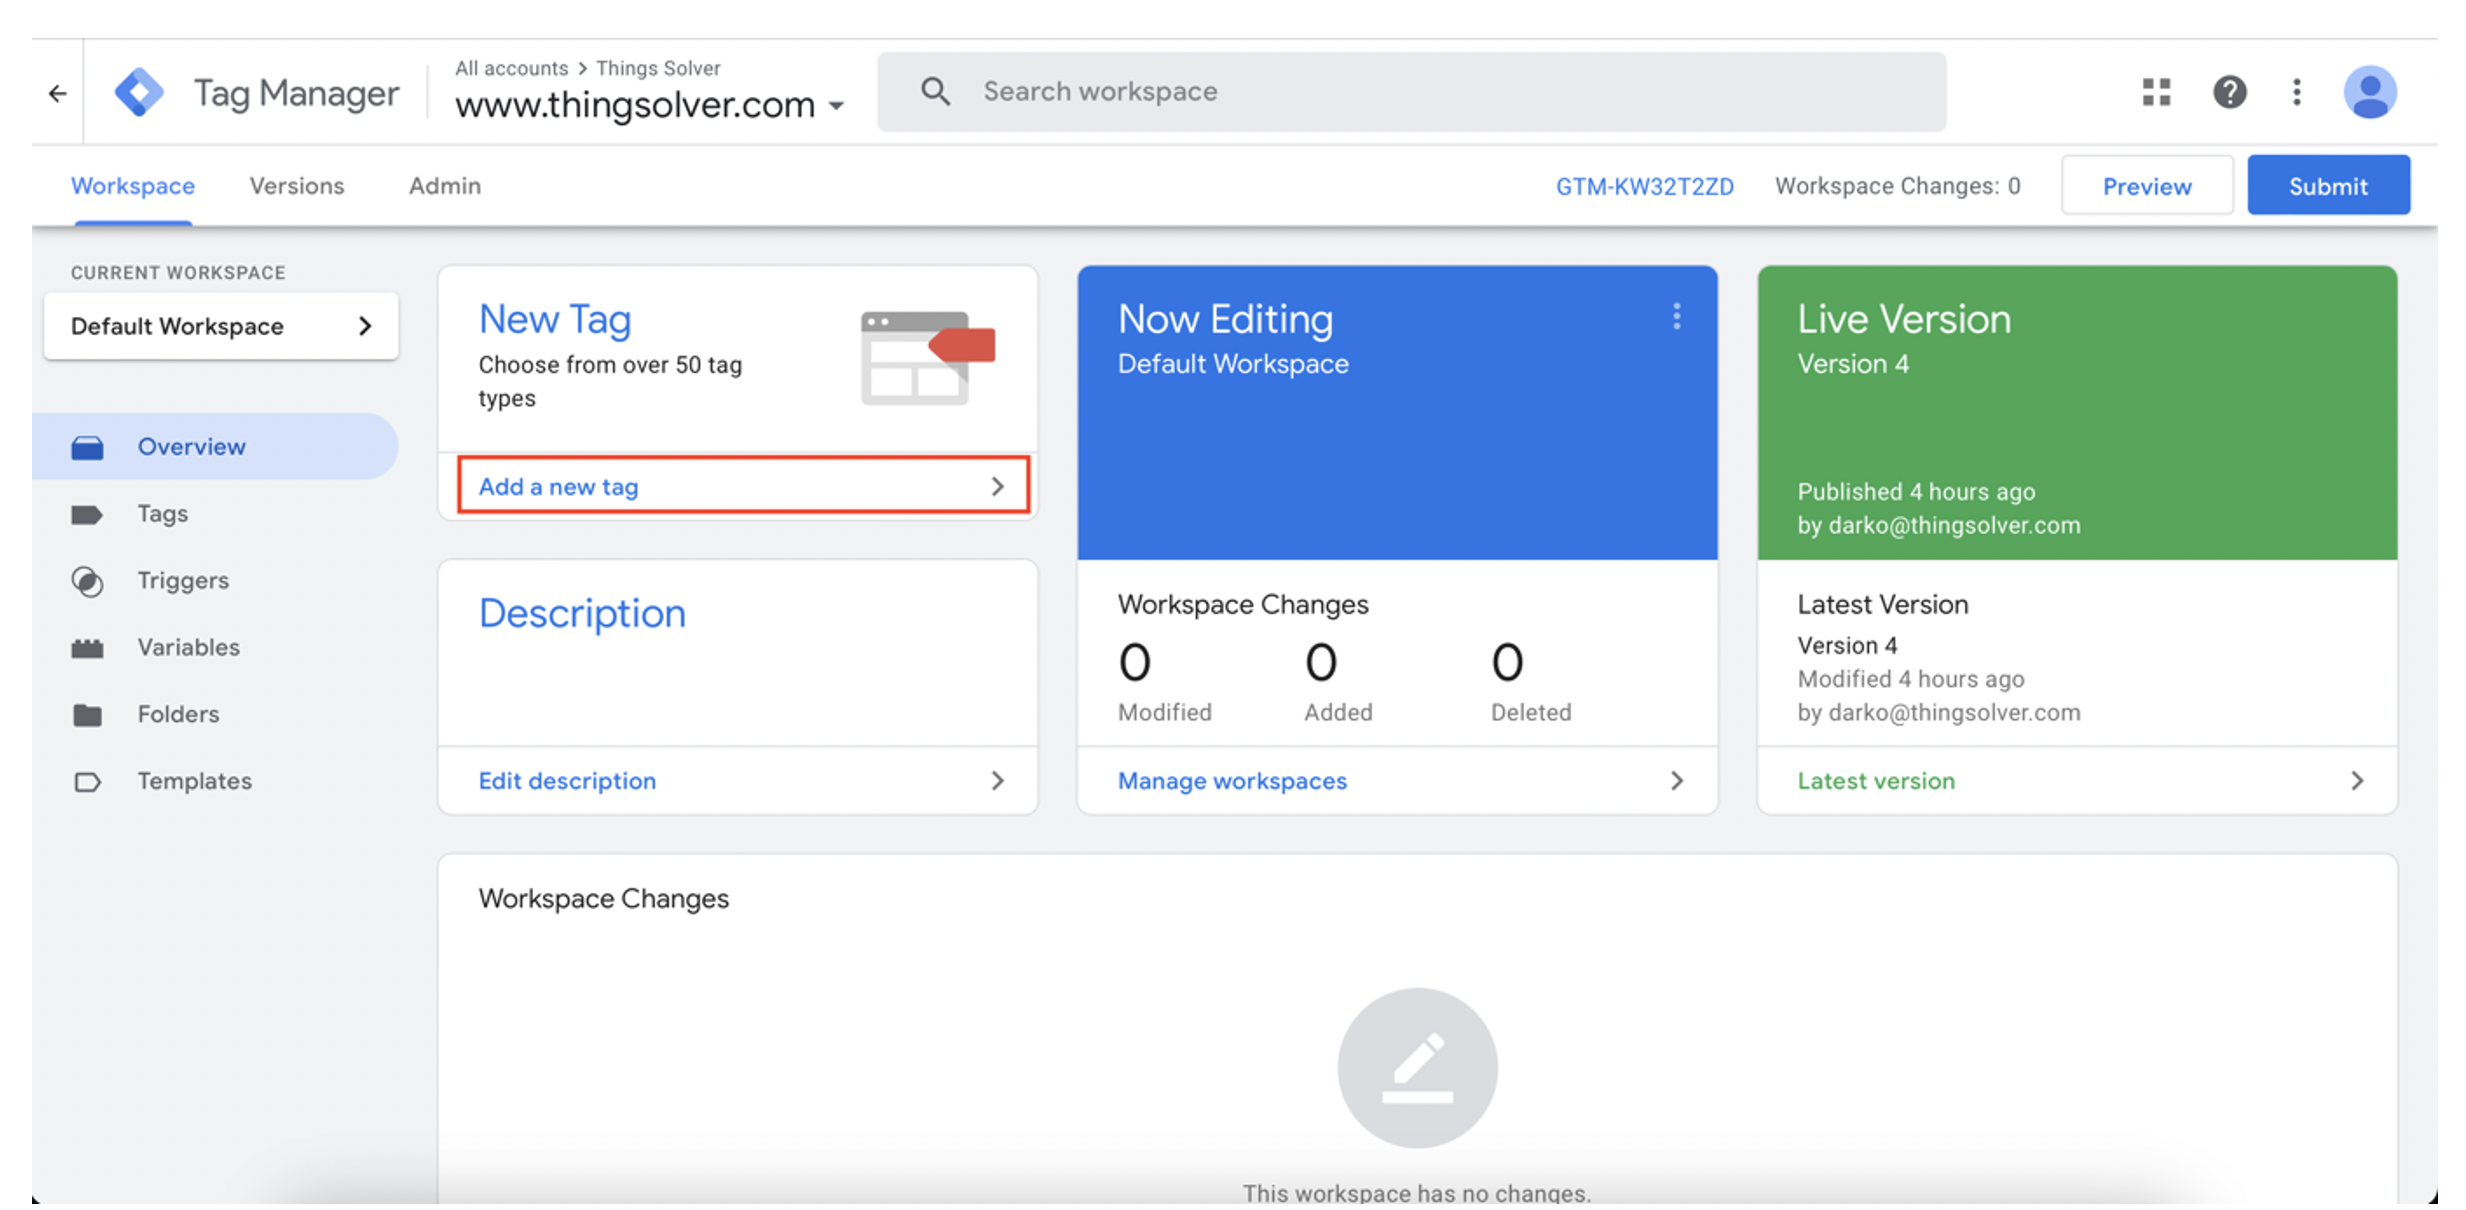
Step 2 – Add a new tag
Click on the option for adding a new tag.
Step 3 – Add tag
Name tag as Things Solver Tracker (check the image below). Click on Choose a tag type to begin setup for adding a tag.
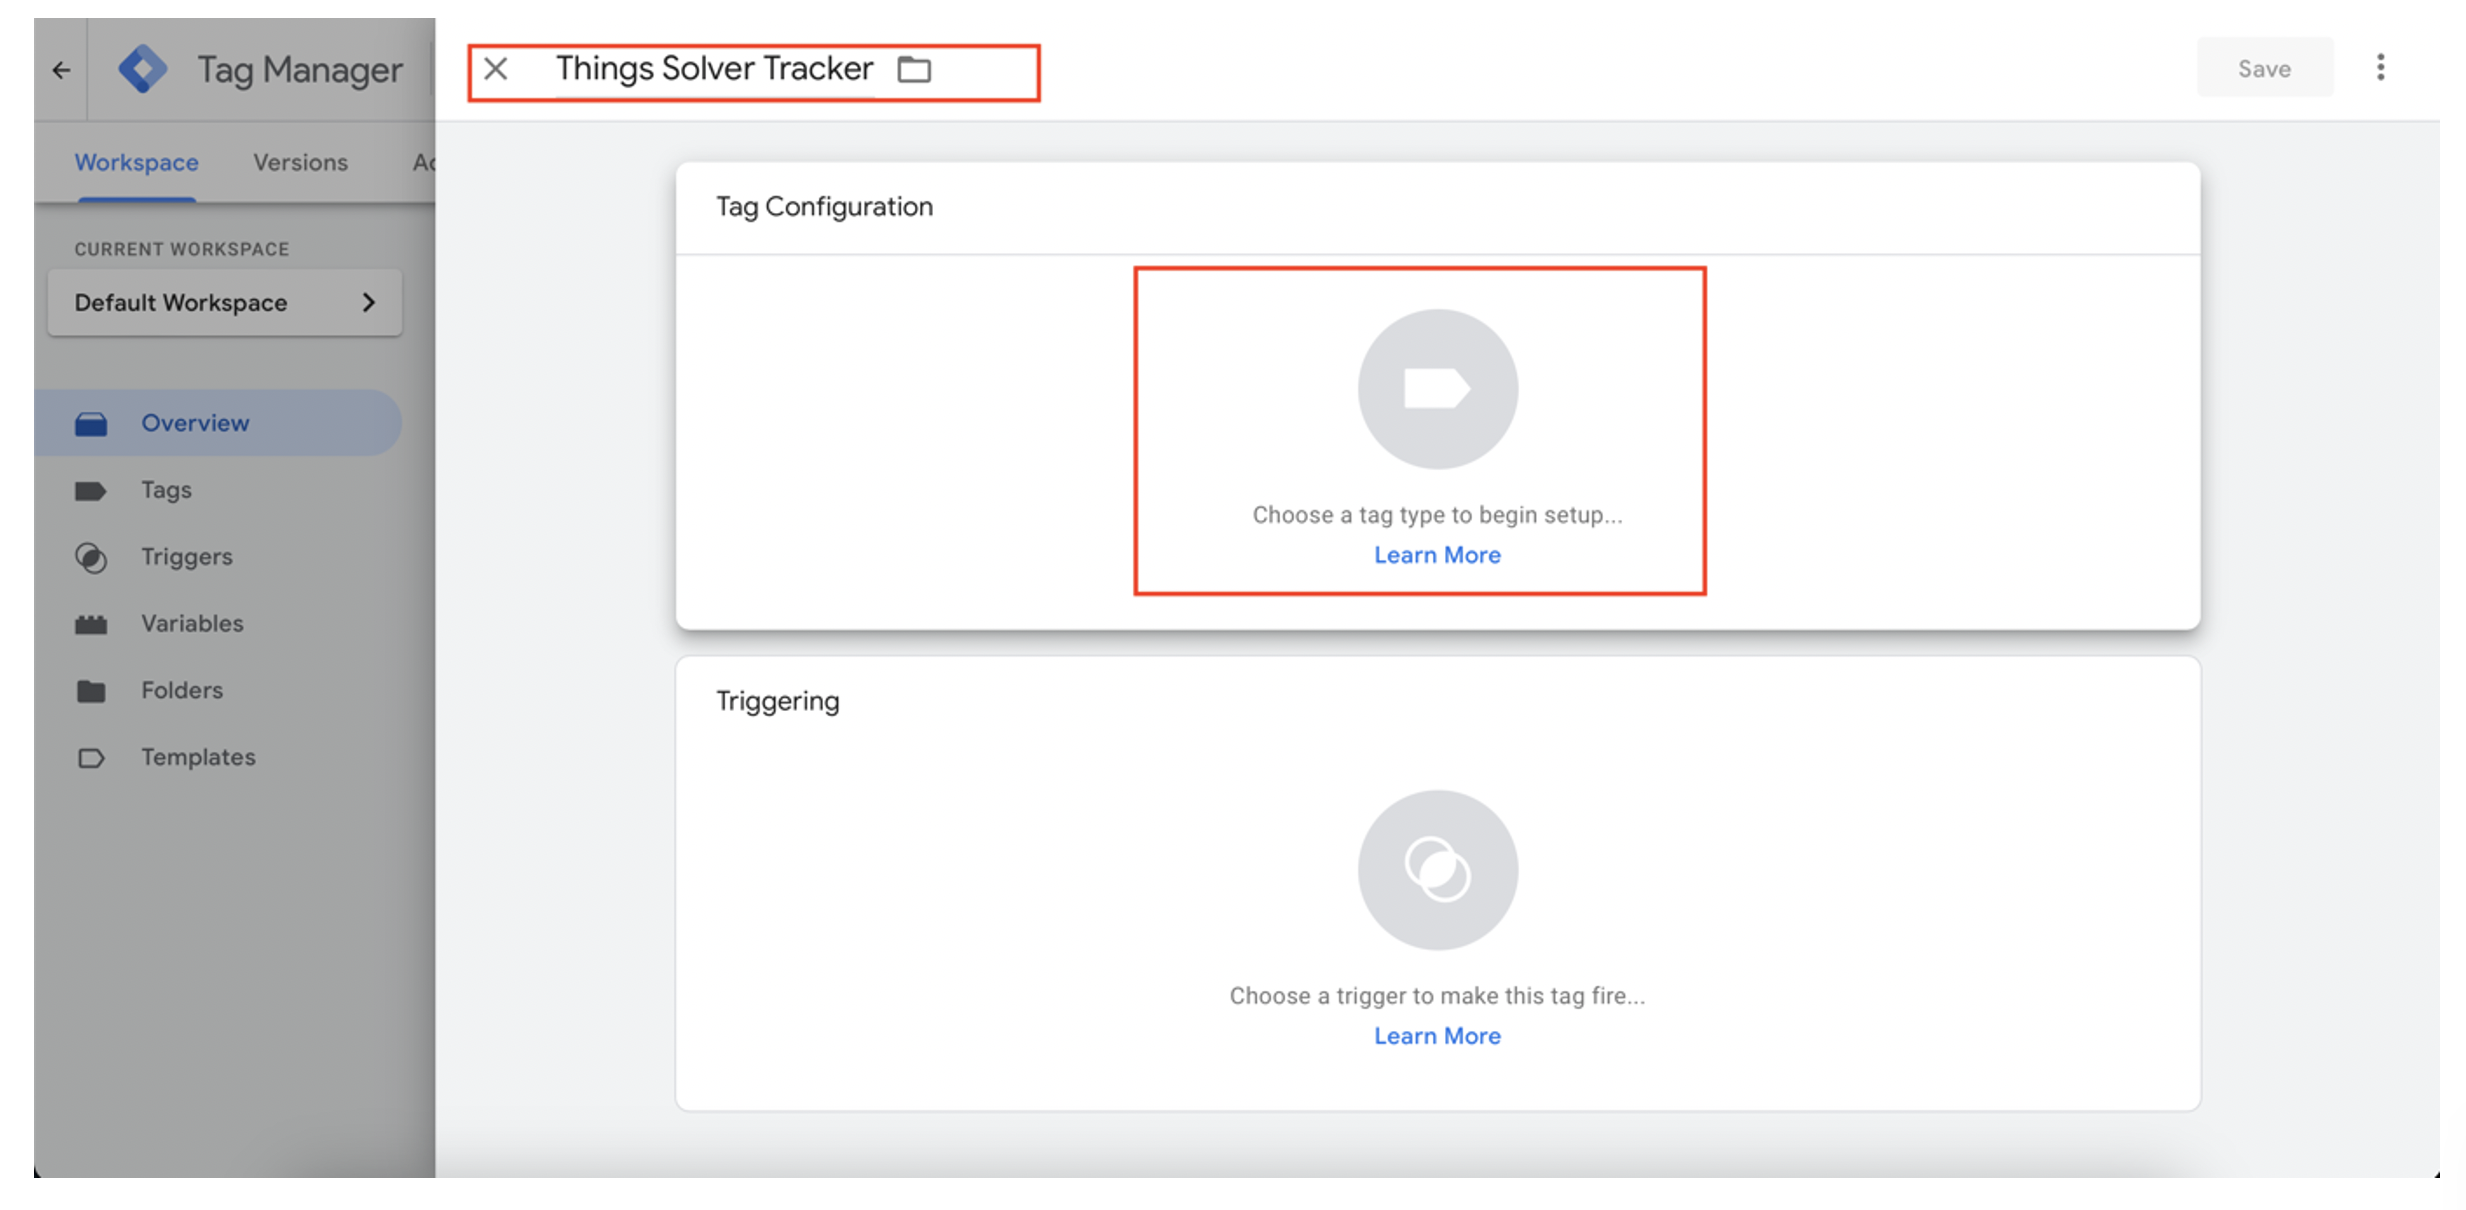
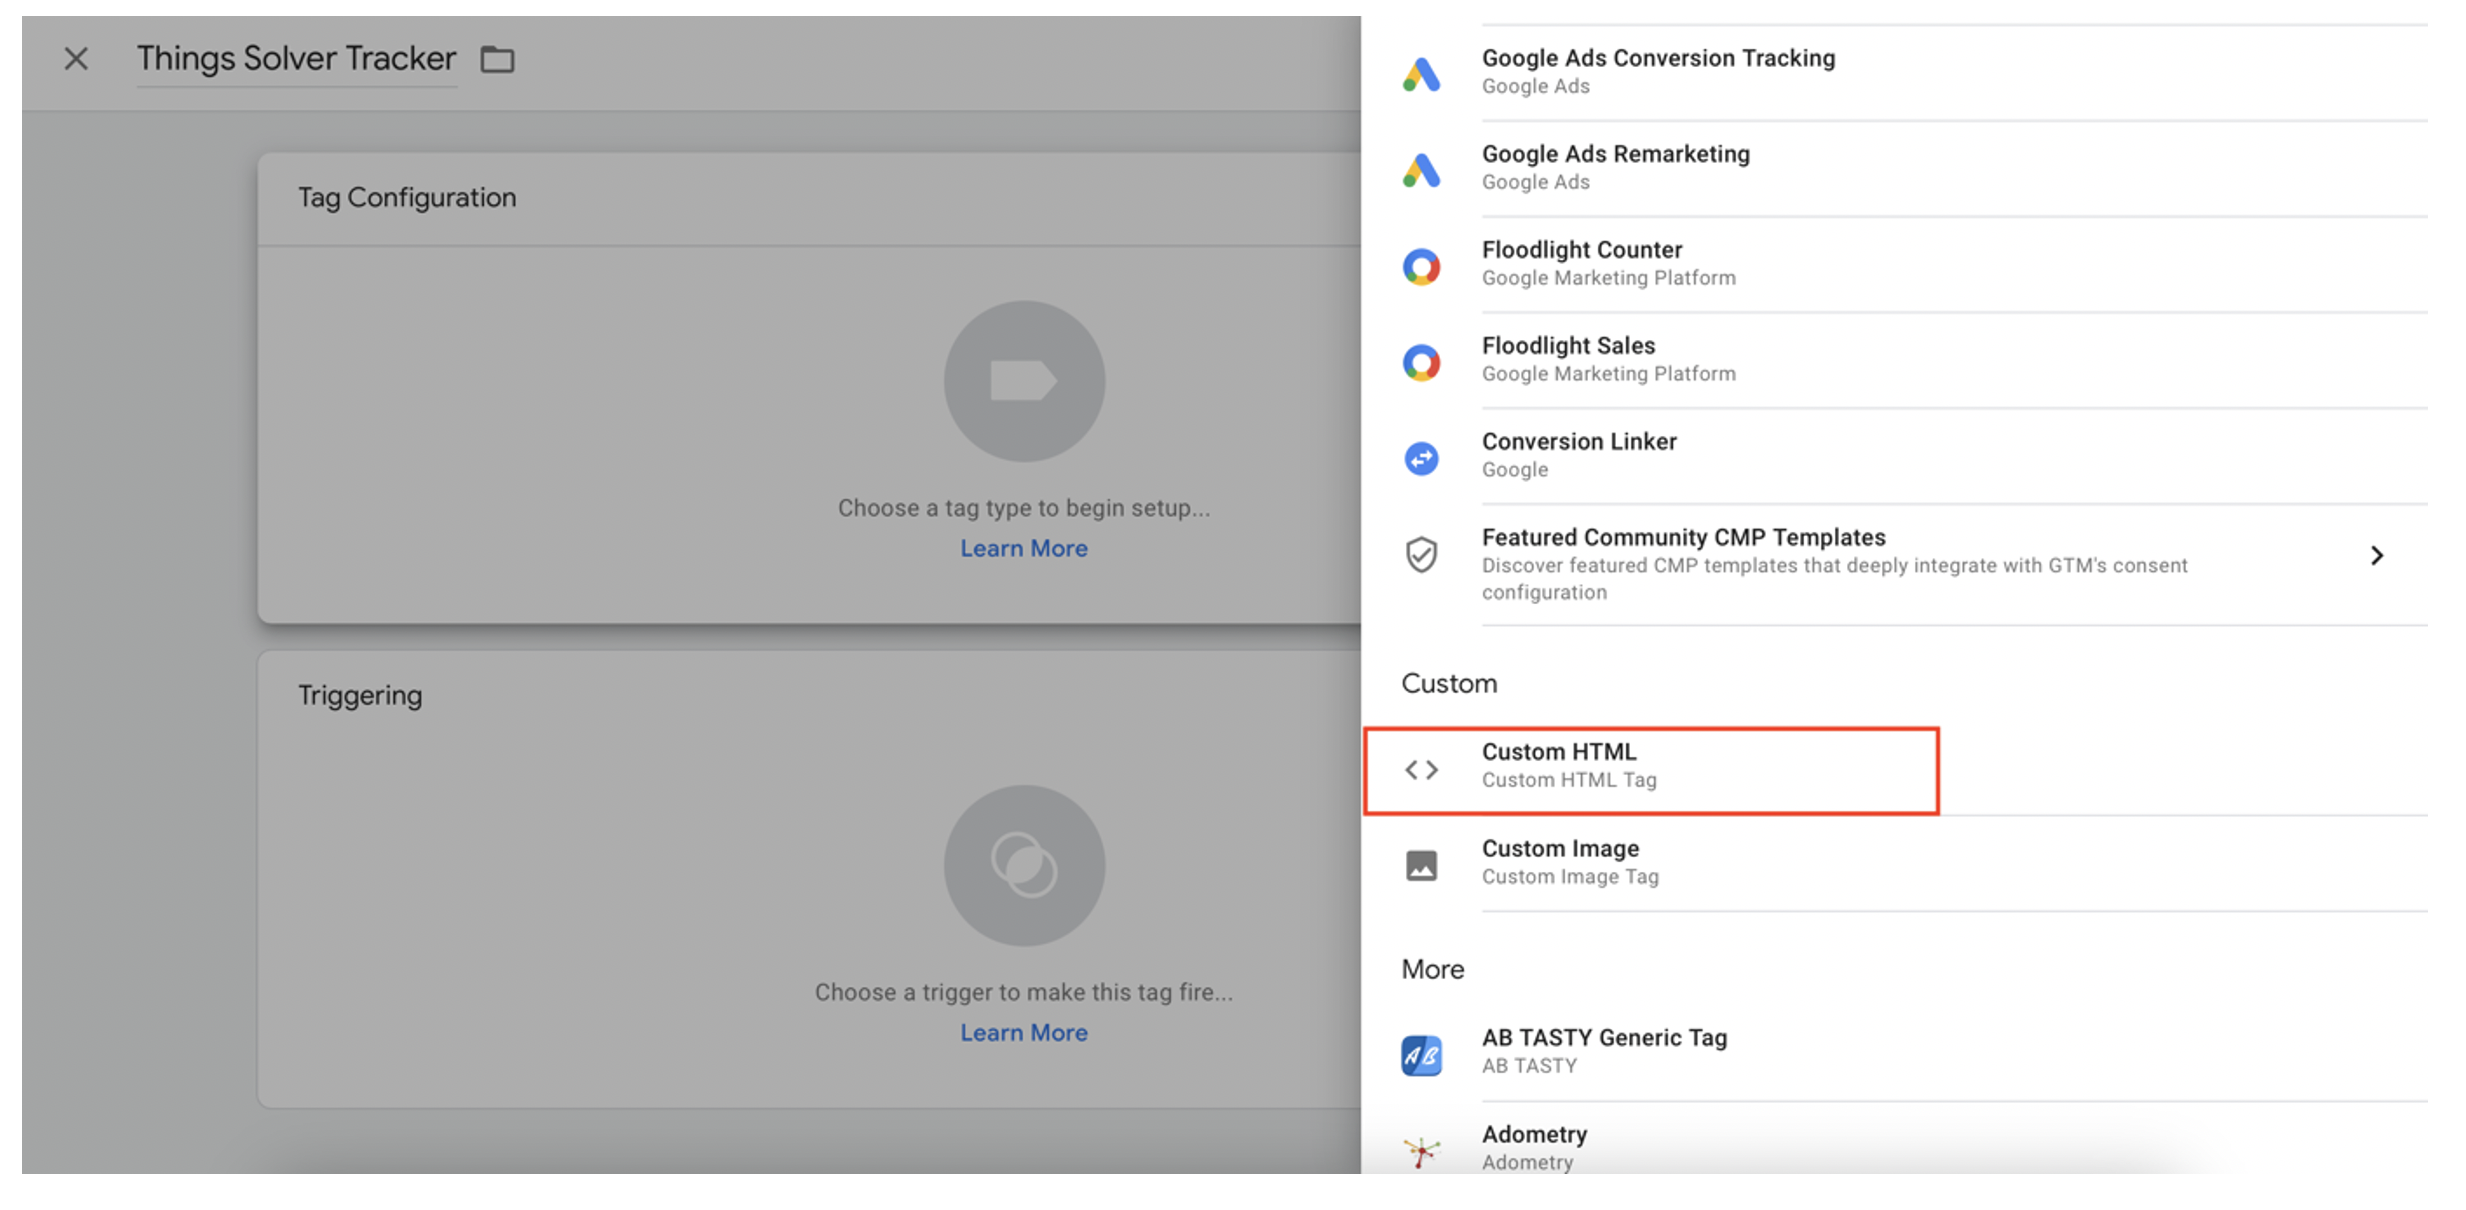
Step 4 – Choose tag type
For adding Things Solver Events SDK, choose Custom HTML.
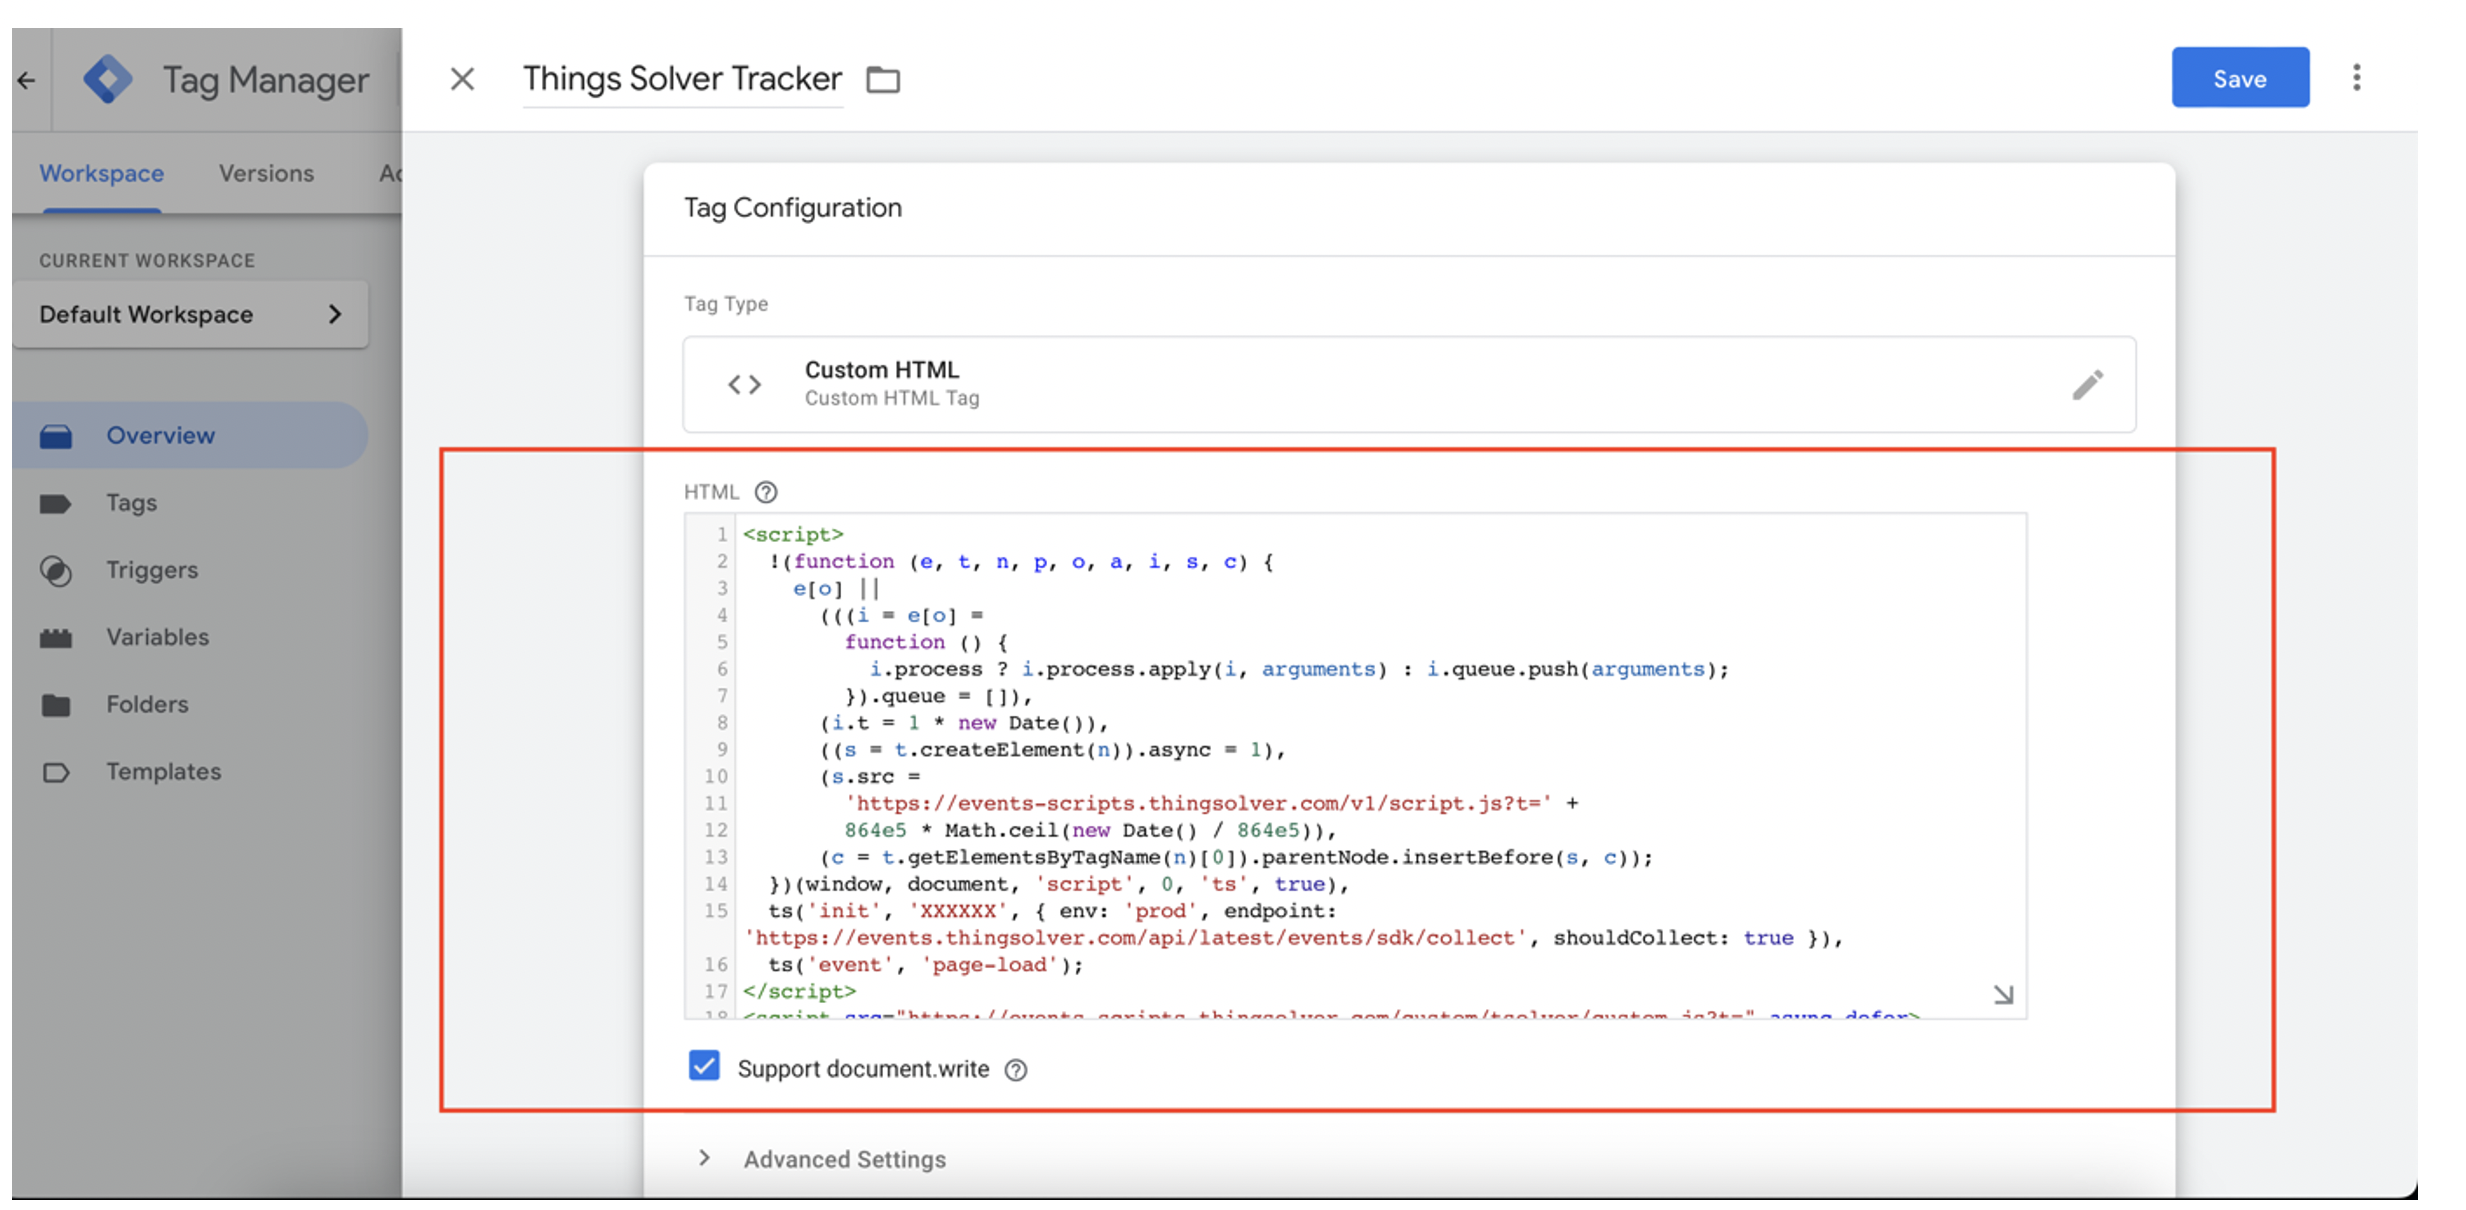
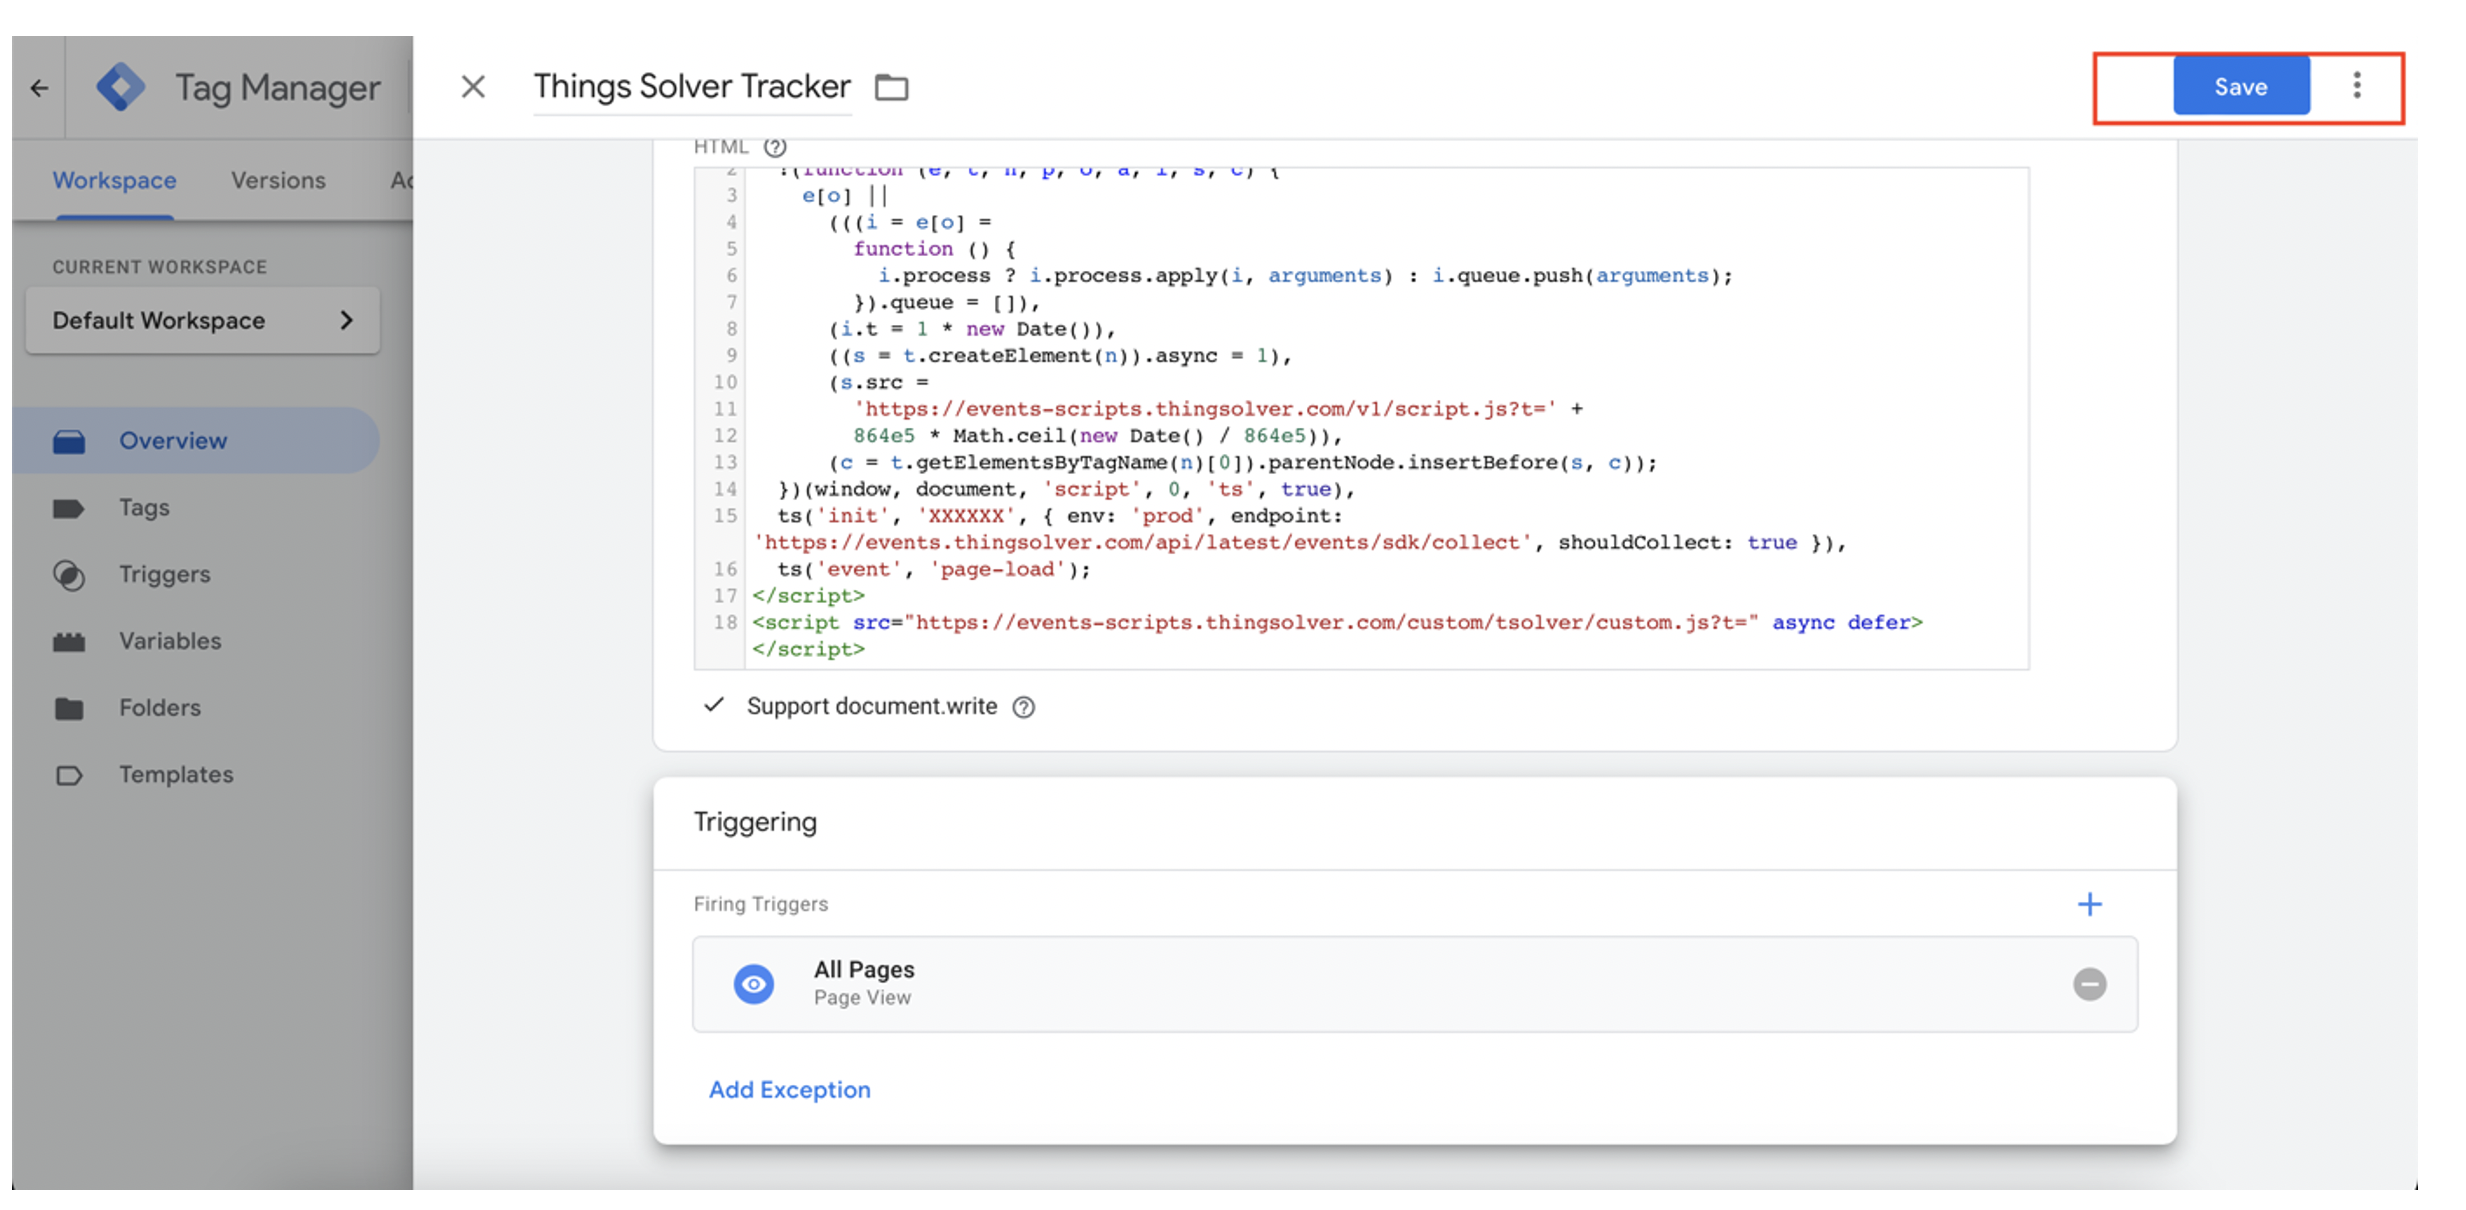
Step 5 – Add code snippet from the first part
Copy code to editor (check the image below). Additionally, check the Support document. write.
Step 6 – Triggering option
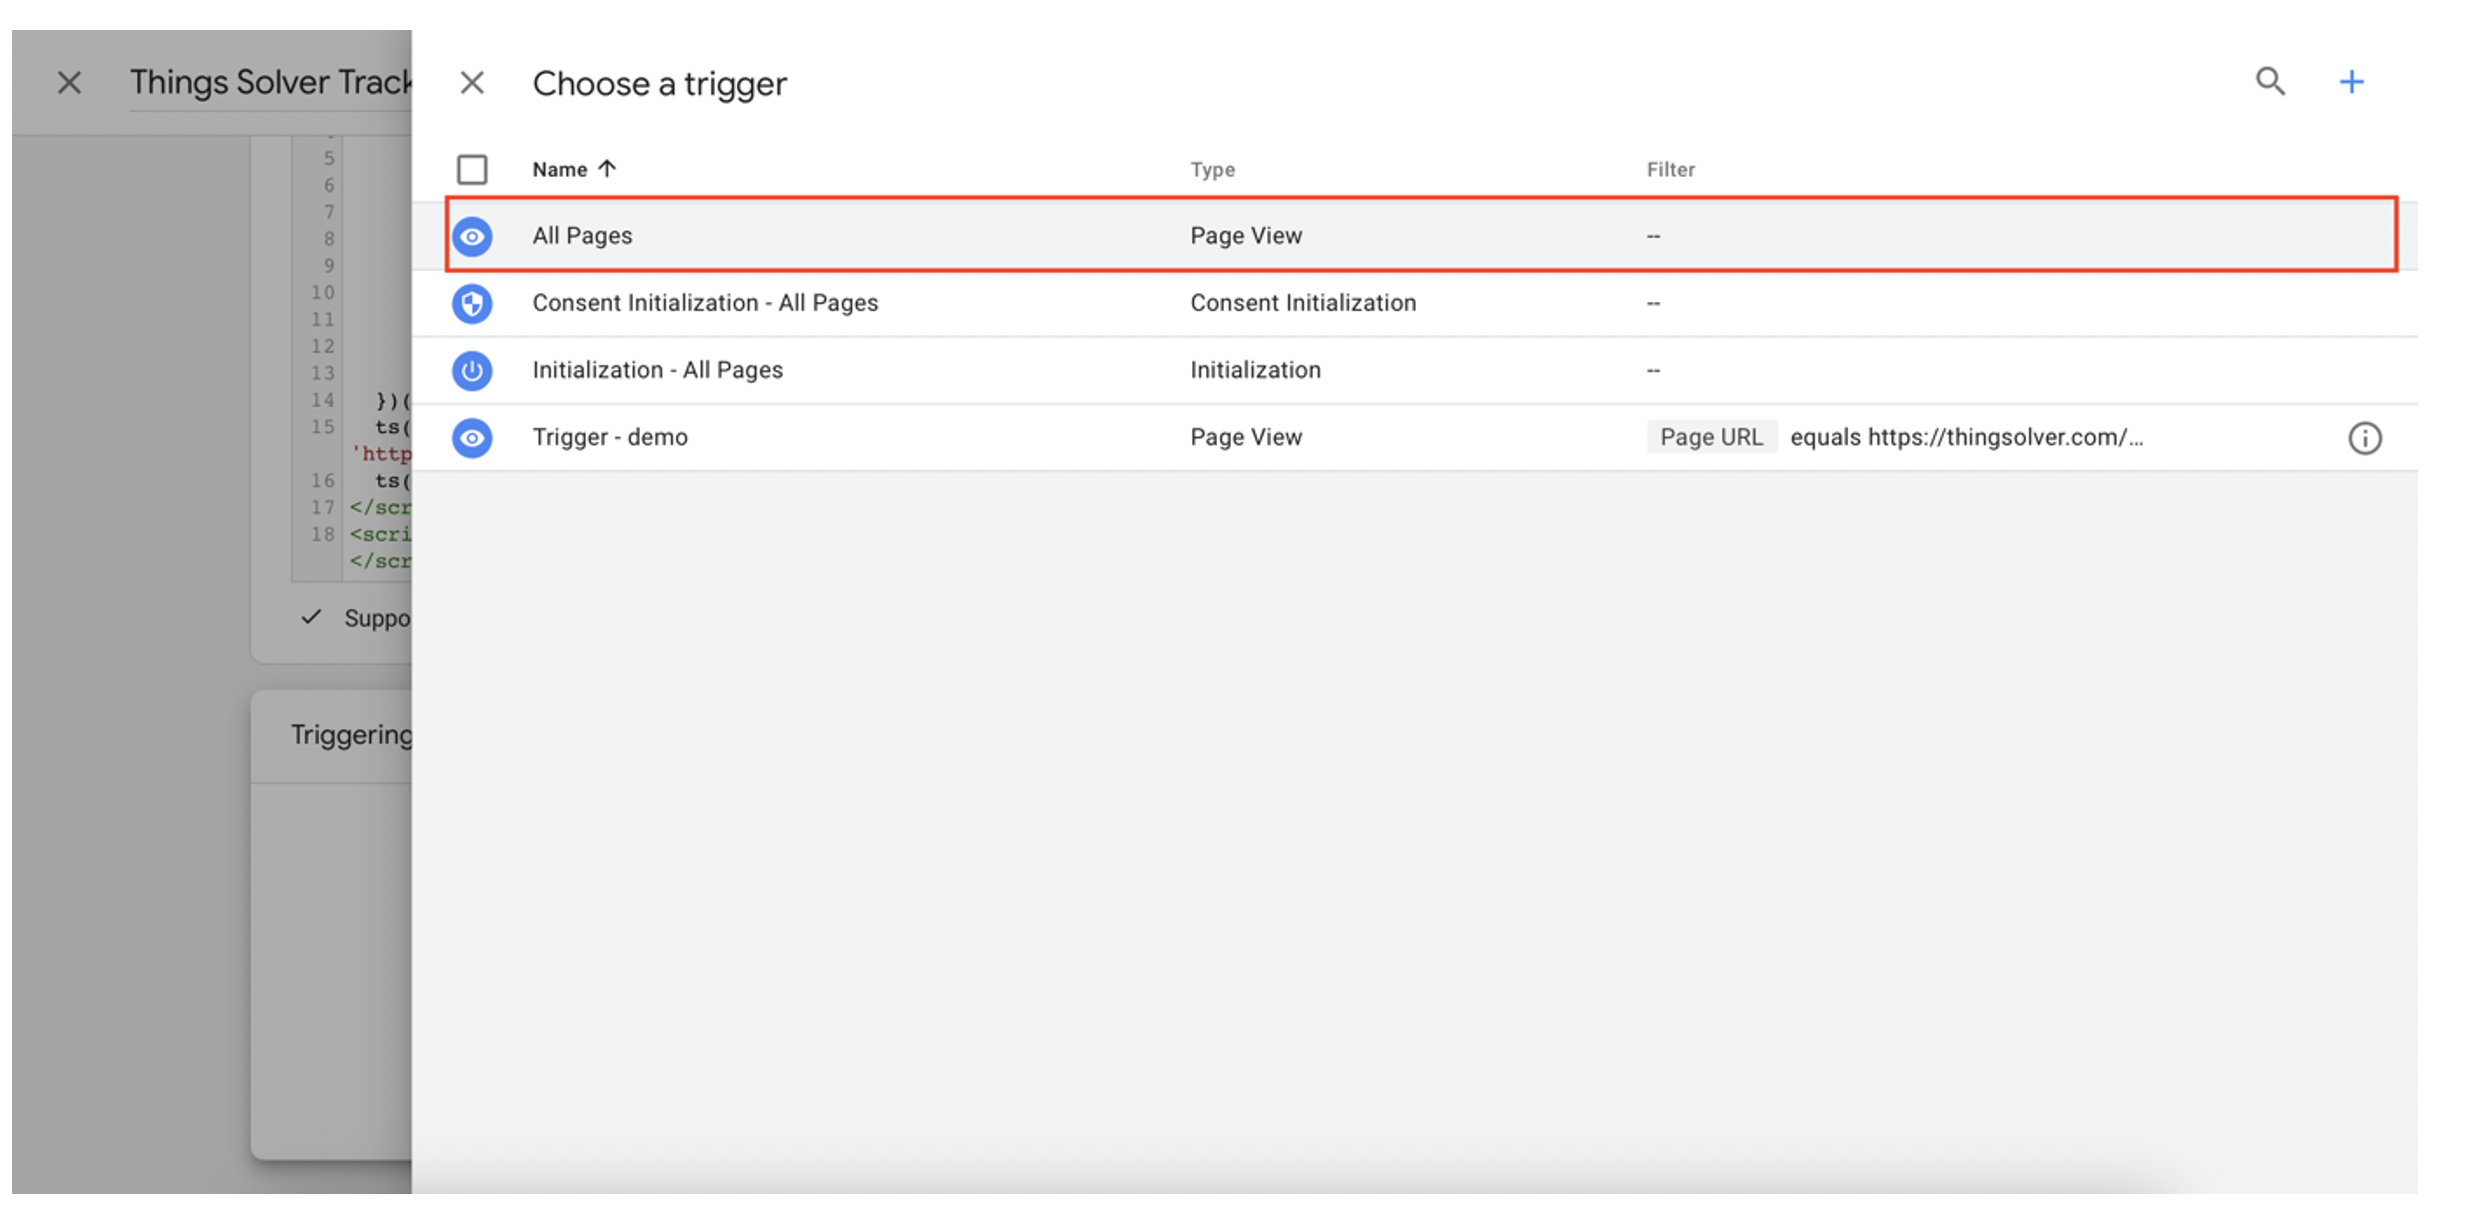
Click Choose a trigger to make this tag fire.
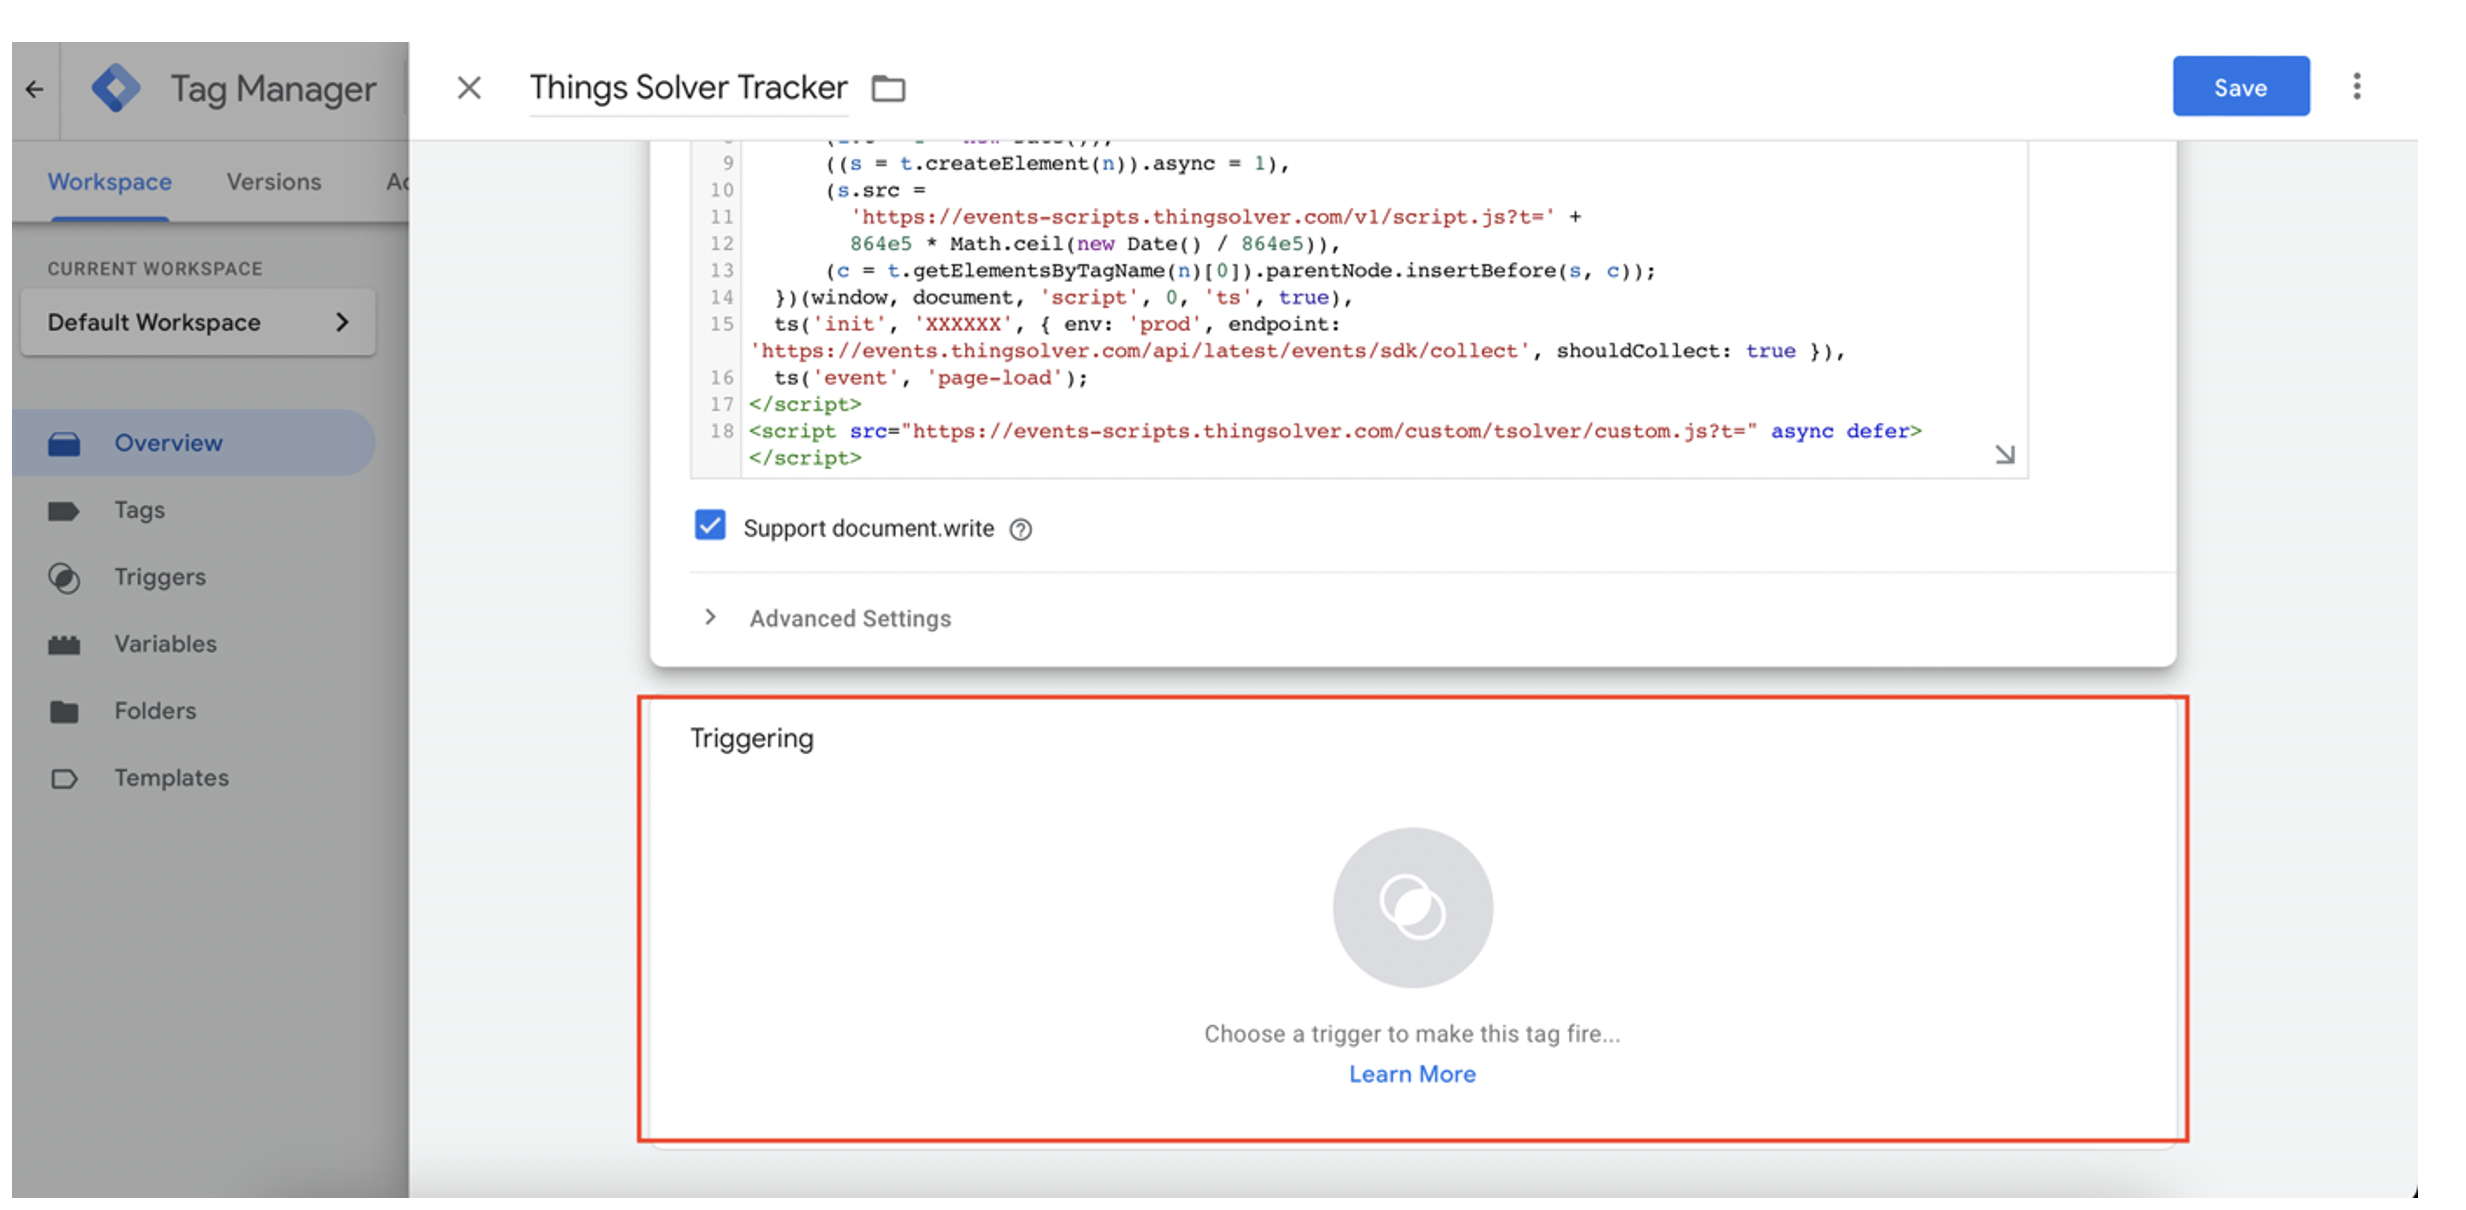
Step 7 – Choose the Trigger tag
Choose the All Pages option with Page view type to collect data on every event.
Step 8 – Save tag definition
When all data is inserted (check the image below). Click on the Save button.
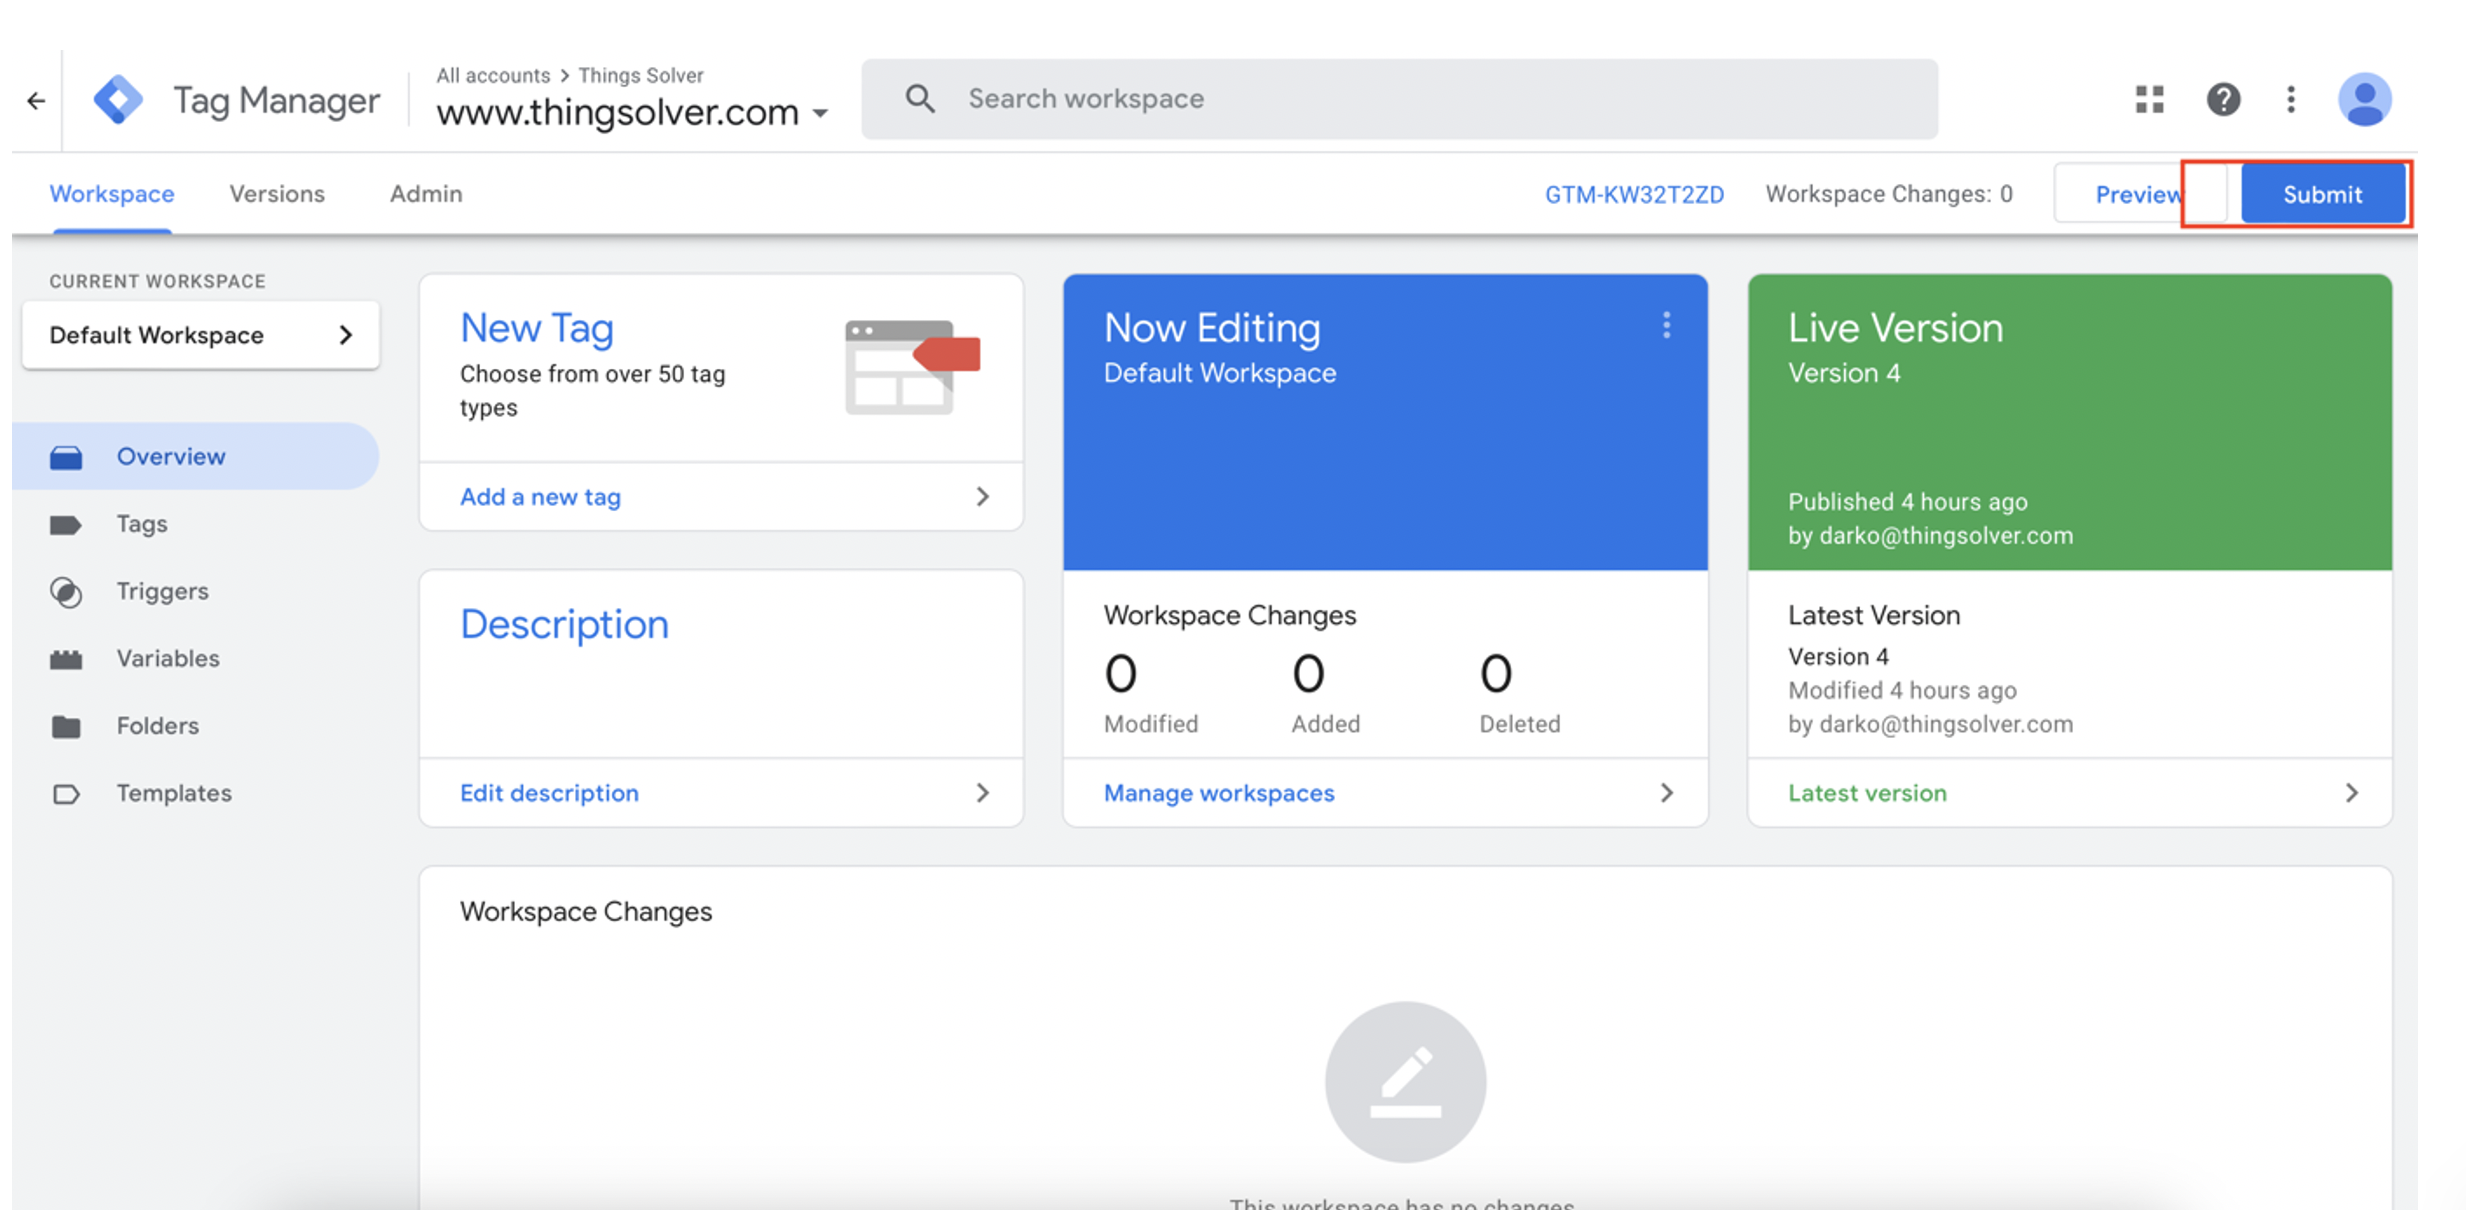
Step 9 – Submit tag for production,
Click the Submit button to publish the tag on your web.
What events will be collected?
Default events:
- page-load
- page-close
- focus
- link
Optional events:
- phone
Tracked events:
- Focus event - it's fired every time the website user stops looking at the website page
- Link event - it's fired if a user clicks on a link that will take him/her to an external host (website) within 5 seconds of accessing your website
- Email event - it's fired when a website visitor is leaving the page and he/she has entered a valid email address
- Phone event - it's fired when a website visitor is leaving the page and he/she has entered a valid phone number
What data is being collected?
- _tsf_cl: cookie long
- _tsf_cs: cookie short
- ua: user agent
- u: url
- t: timestamp
- p: path
- r: referrer
- h: host
- hn: host name
- scr_ah: available height on screen
- scr_aw: available width on screen
- scr_h: screen width
- scr_w: screen height
- e: event type
- ev: environment type
- dt: document title
- dn: domain name
- uid: client id from snippet
- em: email
- pn: phone
- fs: focus in seconds
- c: custom data
- csid: all keys from custom
How does cookie short work?
Cookie short expires if a visitor doesn’t have any interaction with a website for 20 minutes. As long as the user interacts with the website, the duration of the cookie resets to 20 minutes.
What's behind all this?